
Your courses decide what Study shows you, because every course holds its own textbooks and related books. You set them up once, then change them when your semester changes.
The pictures in this article use made-up courses and a made-up school. Yours will show your own school, programme and courses.
What you need
- Your school, department, level and semester. Acadeva fills them in from your profile, so you only correct what is wrong.
- A connection. Two steps of setup talk to the server, so you need to be online.
Set up your courses
Open the Home tab and tap Study. If you haven't set up yet, you see Setup your study. Tap Get started.

- Tap Get started.
Mobile: Study before any courses are set up. On Confirm your details, check School, Department, Programme, Current level and Current semester. Tap a field to change it, then tap Next. The button stays grey until the school, programme, level and semester are filled in.

- The programme decides which courses you are offered.
- Your level and semester.
- Next saves these details to your account.
Mobile: Check your details before you pick courses. Tick every course you're taking this semester. Ticked courses move up to Selected Courses, courses for your level sit under Recommended, and the rest are under All Courses. Type to search finds a course by name. Tap Next.

- Search the list by course name.
- Ticked courses collect here.
- Next stays grey until you tick at least one course.
Mobile: Tick the courses you're taking. On Finish setup, tap Add course codes (optional) if you want to type codes, then tap Complete. Acadeva reloads and opens Study with your courses.

- One field per course. Leave a field empty to skip it.
- Complete replaces your course list with the courses you ticked.
Mobile: Codes are optional. Complete saves your list.
Click Study in the left rail. With no courses yet, the page says No courses set up yet. Click Set up courses.

- Click Set up courses.
- Use a shared link loads a classmate's course setup instead.
Desktop: The Study page before setup. The streak and points are blurred. On Confirm your academic details, check School, Department, Programme, Current level and Current semester (1st or 2nd). The rail on the left lists the three steps: Academics, Courses and Codes. Click Next.

- The three steps: Academics, Courses and Codes.
- The programme decides which courses you are offered.
- Next saves these details to your account.
Desktop: Step 1 of the setup. On Pick your courses, tick every course you're taking. Ticked courses collect under Selected, courses for your level are grouped under a heading such as Recommended for 200 level, and the rest are under All courses. Search courses finds a course by name or code. The box on the right keeps count, and the x beside a name unticks it. Click Next in that box.

- Search the list by name or code.
- Ticked courses collect here.
- The count and the Next button.
Desktop: Step 2. Next is in the box on the right. On You're all set, open Add course codes (optional) if you want to type codes, then click Finish. A message says how many courses were saved, and you land back on Study.

- Type a code, or leave the field empty.
- Finish replaces your course list with the courses you ticked.
Desktop: Step 3. Codes are optional.
What your programme decides
The programme you confirm on the first screen decides which courses Acadeva offers. If it can't match a course list, you see: We don't have a course list for that programme yet. Add the courses you're taking yourself, or go back and try a broader programme name. You can do either.
Some schools run their programme on Acadeva. If yours does, Programme is a drop-down of the programmes your school set up, the courses for your level and semester come ticked, and the course codes come from your school. Setup then ends on the course list: the button reads Complete on the phone and Finish on desktop, and there is no codes step.
Next on the first screen saves your school, programme, level and semester to your account straight away. Complete (phone) or Finish (desktop) then replaces your course list with exactly what is ticked, so a course you leave unticked comes off your list.
Add a course that isn't listed
If your course is missing, create your own. Only you can see it. Acadeva adds it to your list and ticks it for you.
Enter a Course Title (required) and, if you like, a Course Code. Tap Create Course. You go back to the list with the new course ticked.

- The title is required.
- Create Course adds it to your list.
Mobile: A course you make yourself.
Enter a Course title (required) and, if you like, a Course code, then click Create course. The course shows as ticked and marked Created by you.

- The title is required.
- Create course adds it to your list.
Desktop: The Create a course dialog.
Acadeva saves a course you create the moment you create it, so it stays on your list even if you cancel the rest of setup.
Course codes
Codes are optional. The course list shows titles only, because schools number their courses differently. A code you add appears next to the course in Study: above the title on the phone, below it on desktop. A course with no code shows just its title. If your school has set a code, an empty field follows it, so a later change by your school reaches you.
Change your courses later
Open Study and tap Edit next to Your courses. The pencil on the level card is for your school, programme, level and semester: it opens Confirm your details again.
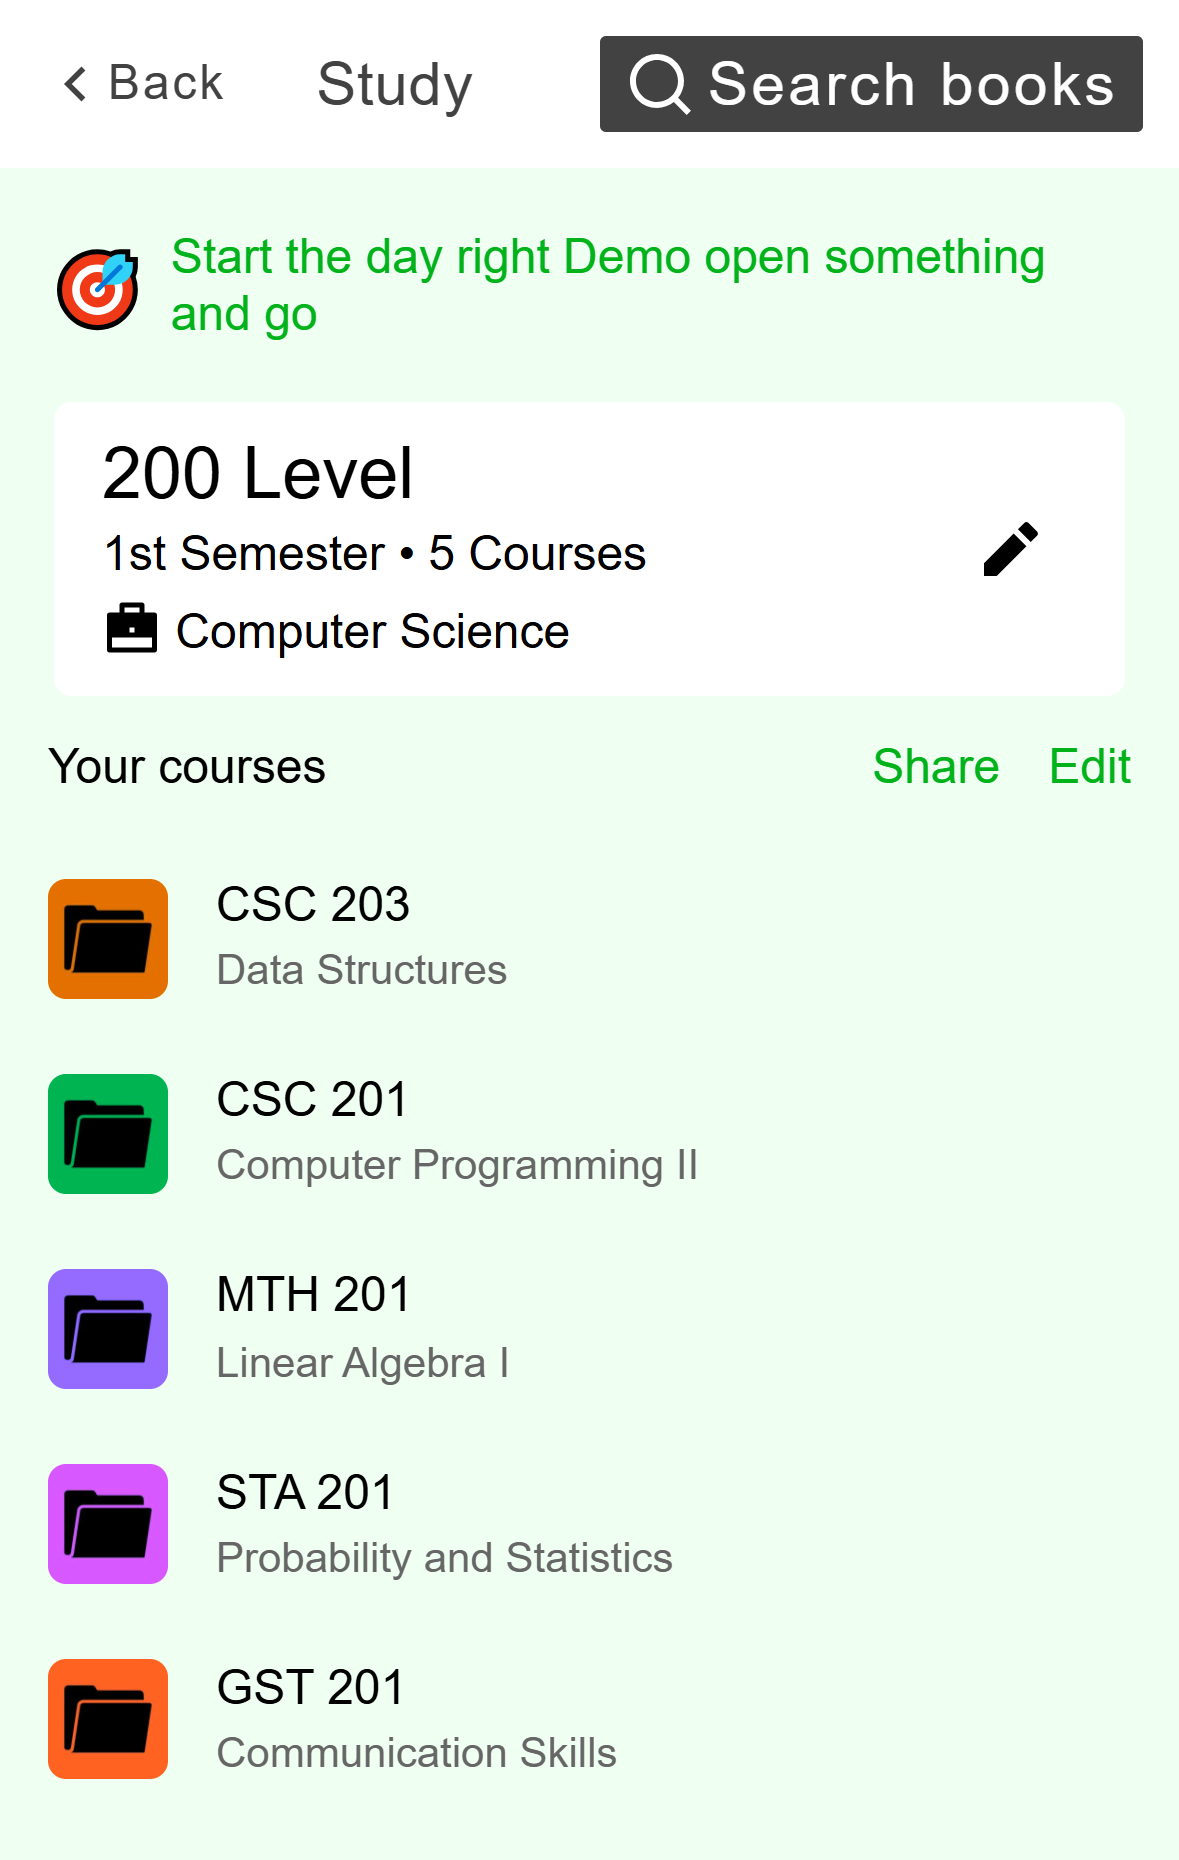
- The pencil changes your school, programme, level and semester.
- Edit opens your course list.
Mobile: Study once your courses are set up. Your current courses open ticked. Tick or untick, tap Next, then Complete.

- Untick a course to take it off your list.
Mobile: Your current courses are already ticked. To change one course's name or code, open the course and tap the pencil at the top right. Change Course Name or Course Code and tap Save Changes. An empty field means the default. If your school has a code, Use school code puts it back.

- Leave empty to keep the default name.
- Your own code for this course.
Mobile: Edit one course.
On Study, click Edit next to Your courses. The setup opens on the course list with your current courses ticked. Untick or tick, then click Next and Finish.

- Edit opens your course list.
Desktop: Study once your courses are set up. To change your school, programme, level or semester, click Academics in the rail on the left. Codes is the third step.

- Jump to any step.
- Take a course off the list with its x.
Desktop: Editing opens with all three steps open. To change one course's name or code, open the course and click the pencil (Edit course) at the top right. Change Course title or Course code and click Save changes. The menu beside the pencil also has Edit my course list.

- The pencil opens Edit course.
- Your own code for this course.
Desktop: Edit one course.
If it doesn't work
- Next, Complete or Finish stays grey: fill in the school, programme, level and semester on the first screen, and tick at least one course. Acadeva won't save an empty list.
- A course you expect isn't there: it may be listed for another level, so check All Courses or search by name. If it still isn't there, create it yourself.
- The phone says Network error, or the desktop shows a red message: you're offline or the server couldn't be reached. Your ticks stay on screen. Reconnect and press the button again.
- Your list is wrong after you finished: tap or click Edit next to Your courses and fix it. You can change your list as often as you like.
Once your courses are in, Browse and open books in Study shows how to find their books, and Add books and past questions to a course shows how to fill a course that has none.