
Every study group has admins and members. Admins decide who is in the group, who can do what, and how new people can join. This article covers the admin controls and what members can do.
You're an admin if you created the group or another admin promoted you. A group can have several admins, each with an Admin badge. Members don't see the admin controls below.
What admins and members can do
- Admins: add and remove members, make others admins, handle join requests, change settings, reset the invite link, and delete the group.
- Members: see everyone's streaks, poke a teammate who hasn't checked in, copy the invite link (unless admins hide it), and leave.
Open the members list
Open You > Study groups and tap the group. Tap the people icon at the top right. A dot on it means a join request is waiting.
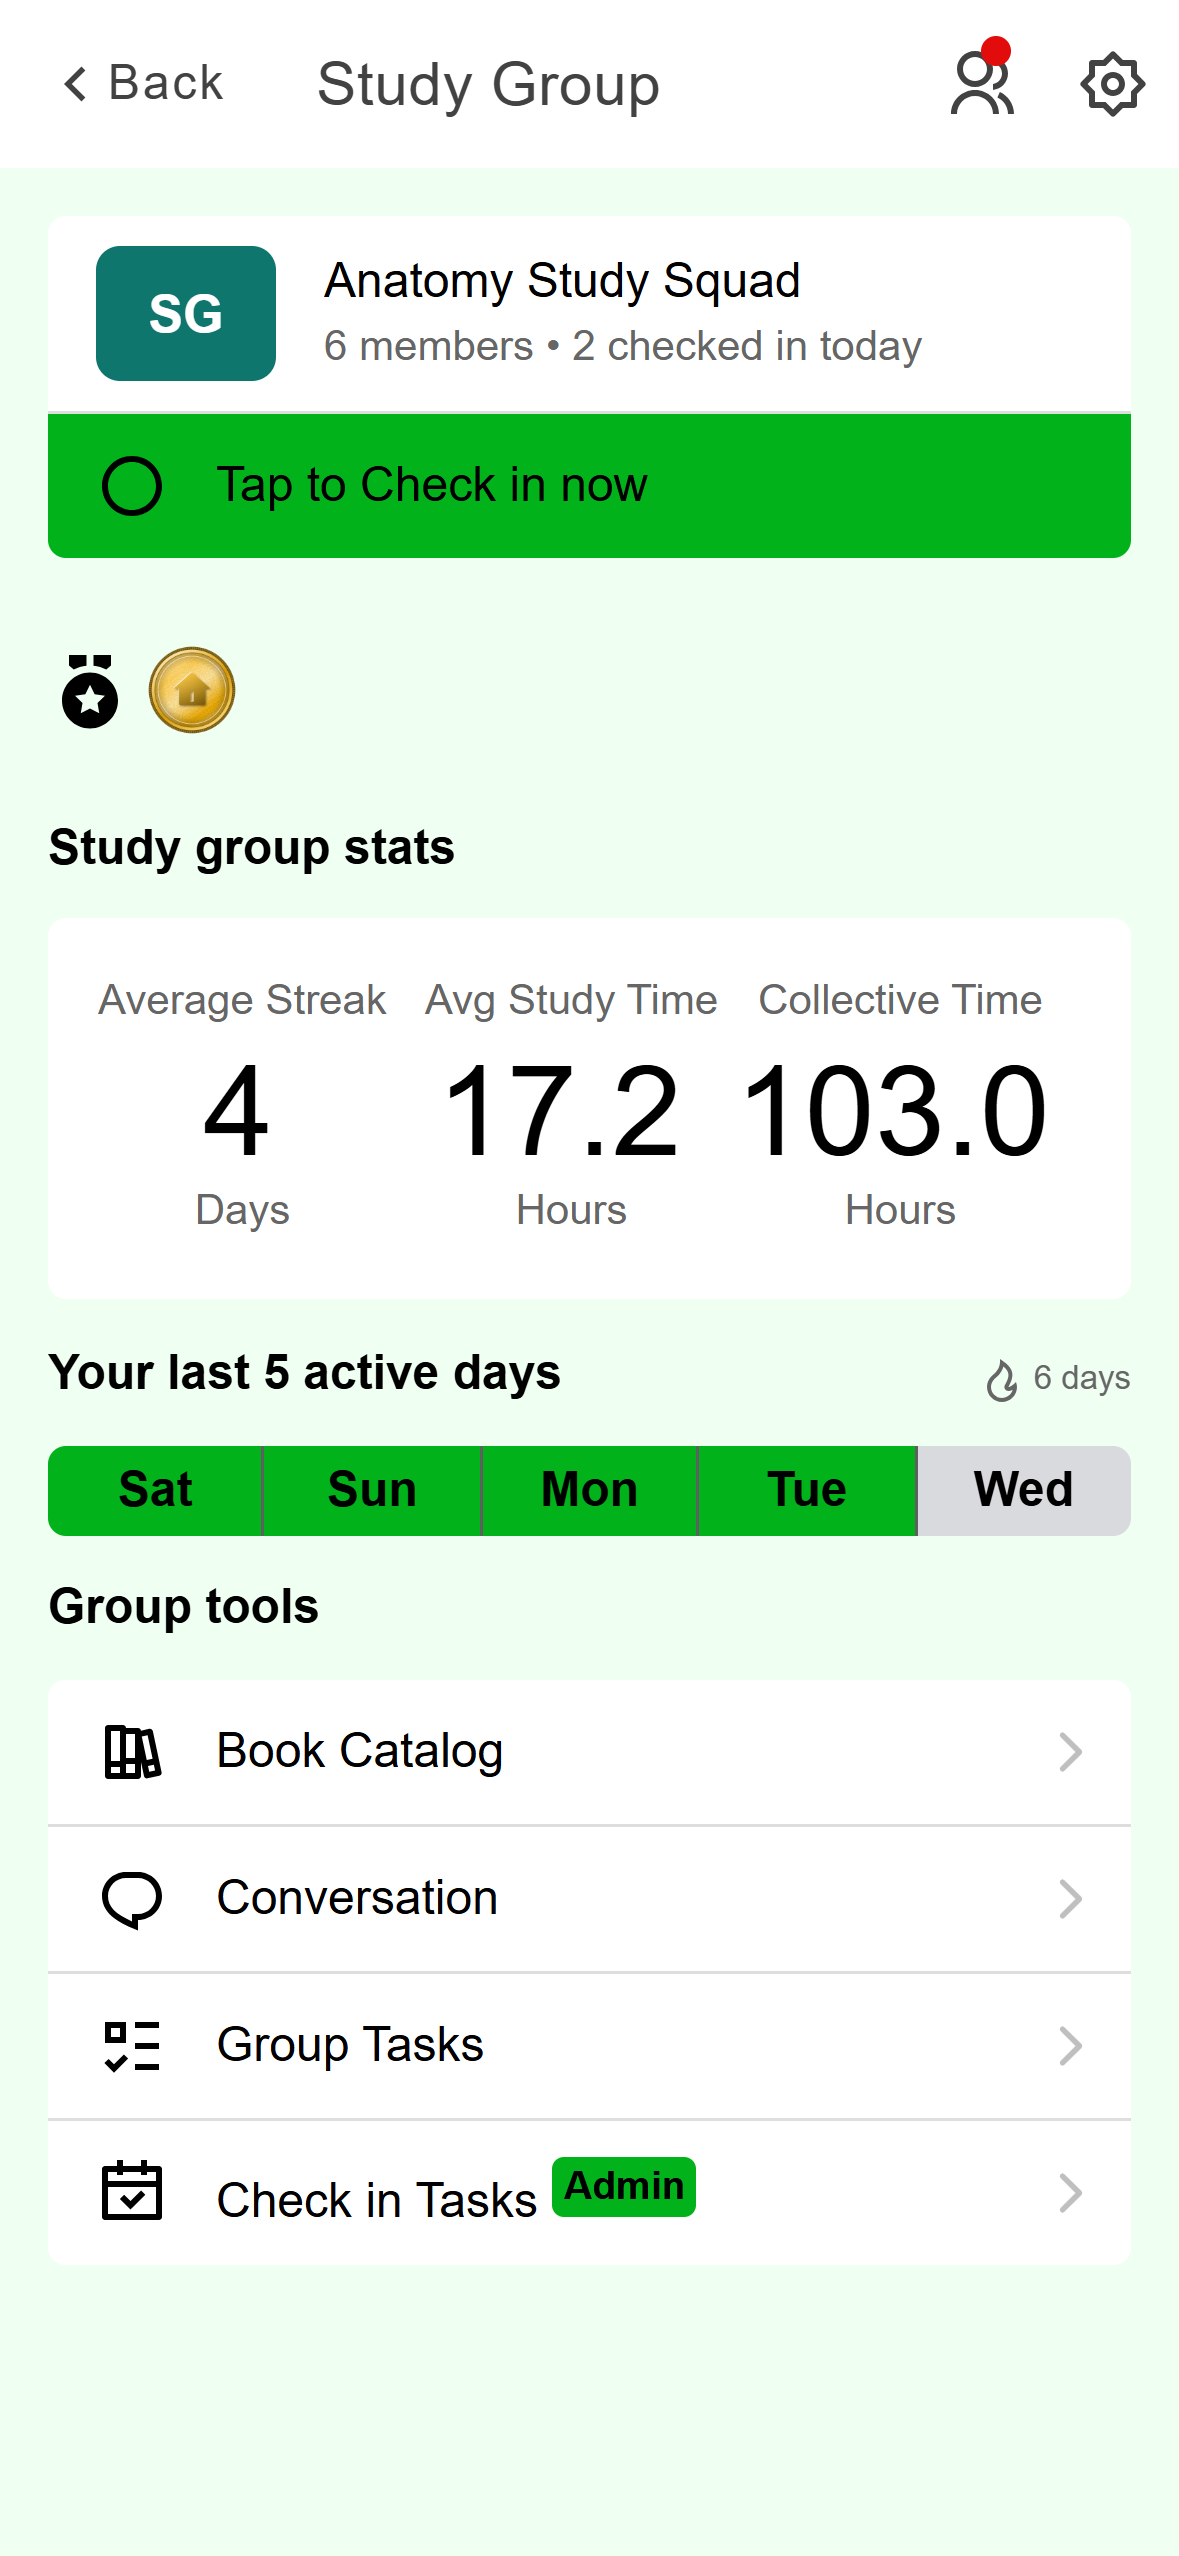
- Group Members. The red dot means a join request is waiting.
- Group Settings, for admins. Members see an info icon here.
Mobile: The two icons at the top right of a group. The Group Members screen lists everyone with their streak and study time. Use the menu at the top of the list to sort by name, streak, study time or group grade.
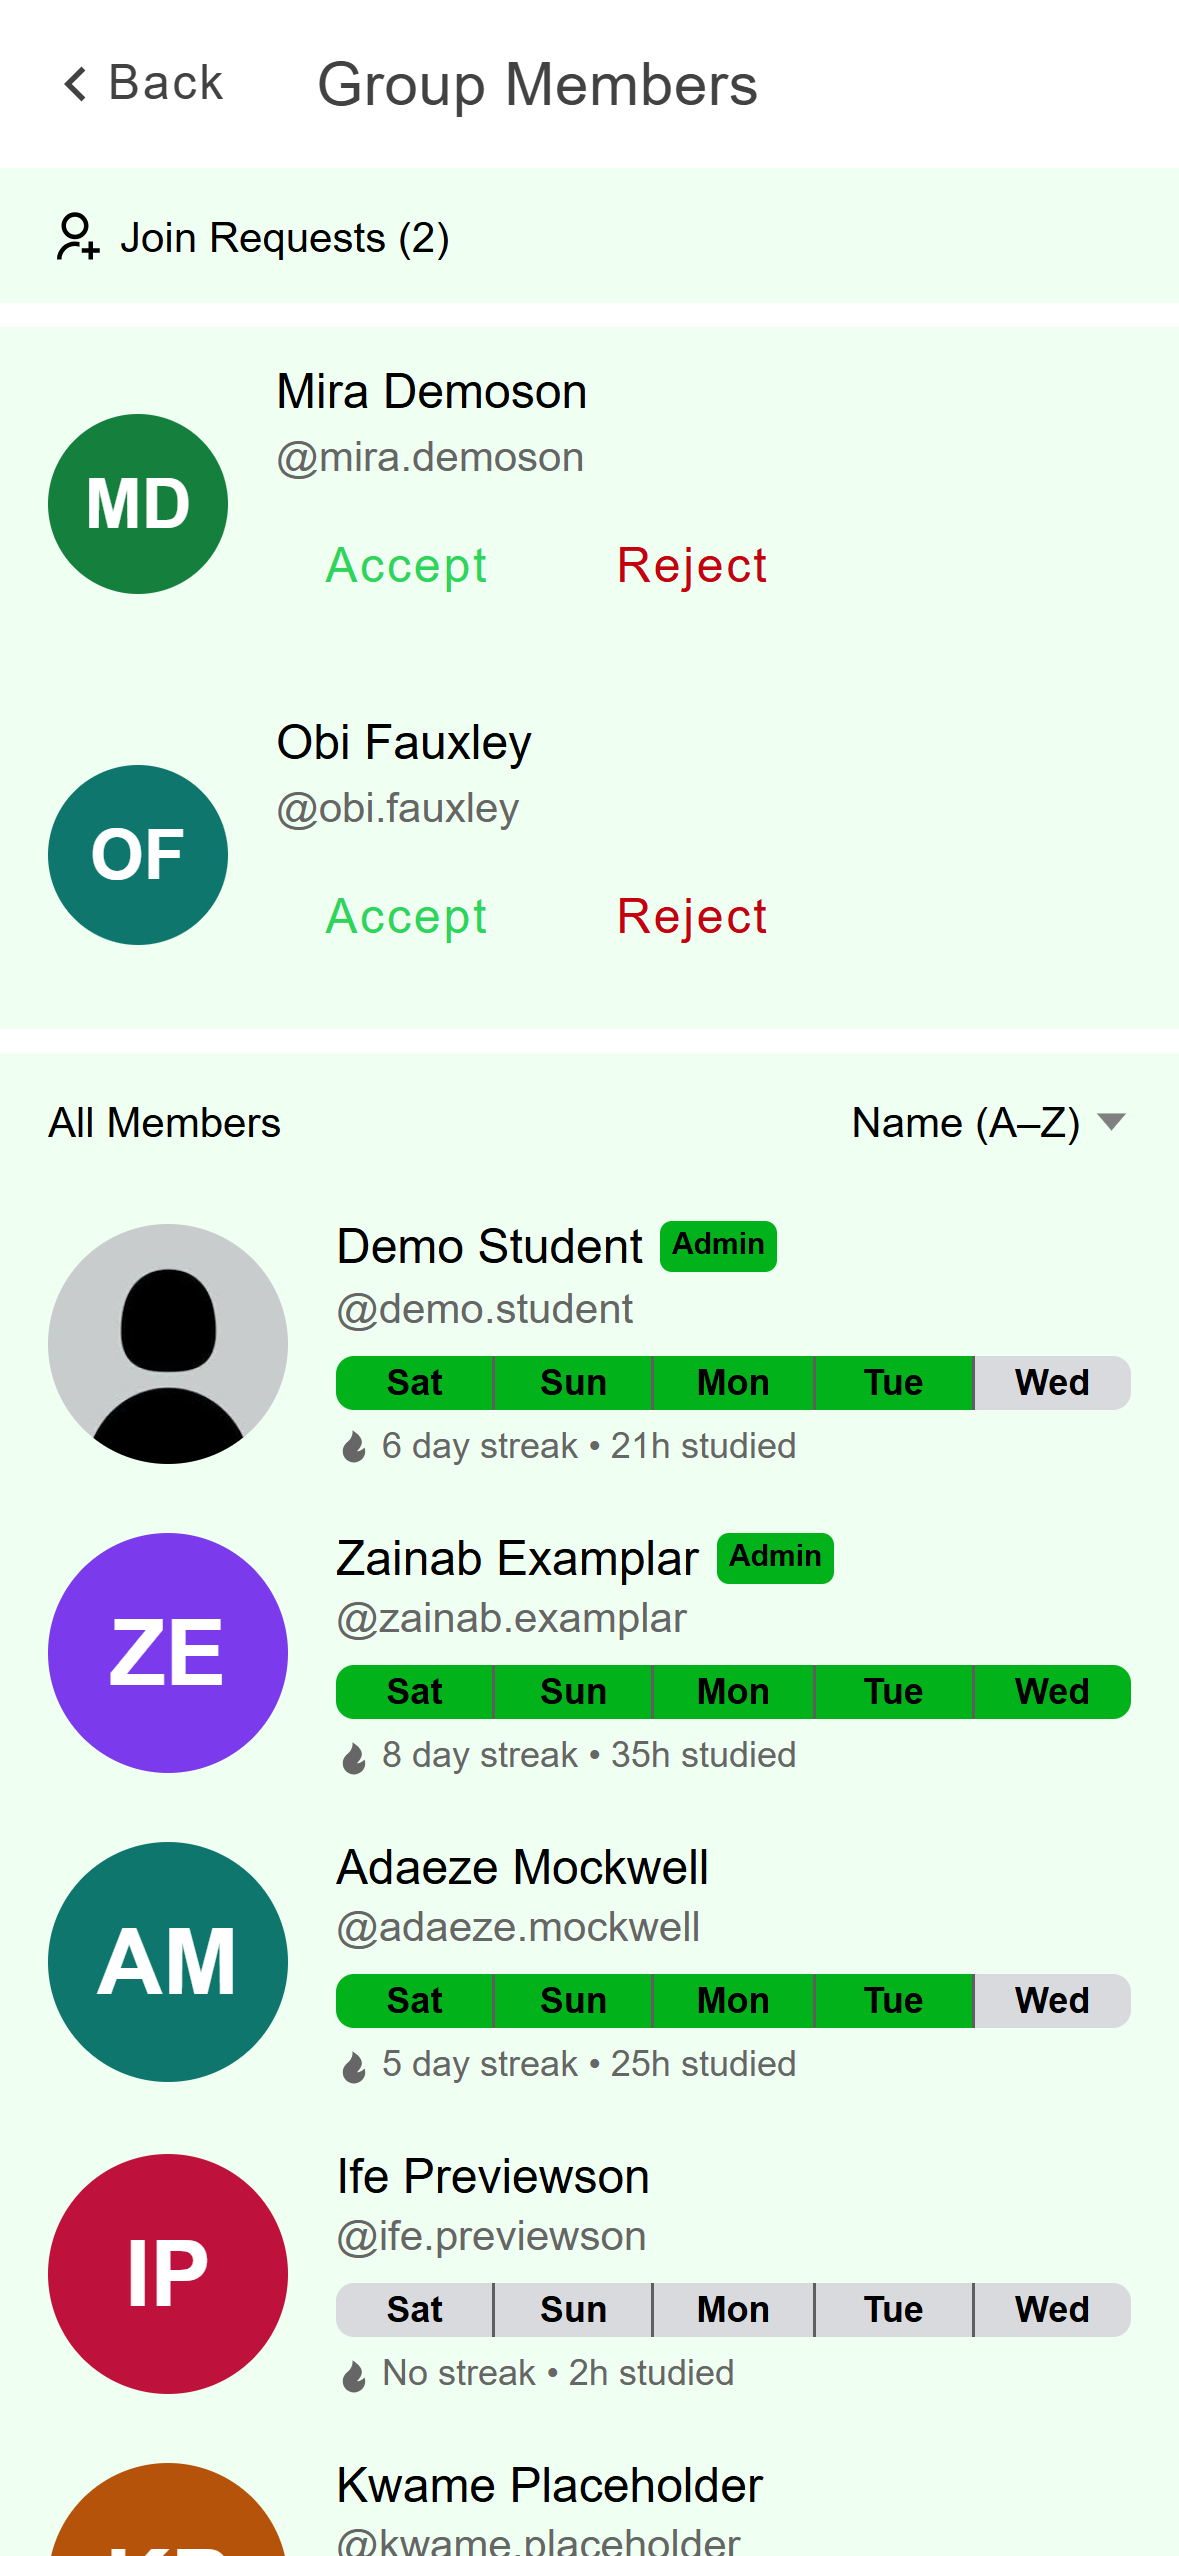
- Accept adds this person to the group.
- Reject removes the request.
- Sort the list.
Mobile: Join requests sit above the member list.
Click Study Groups in the left rail, open the group, and click the Members tab. Each row shows the person's streak, whether they've checked in, and their recent days.
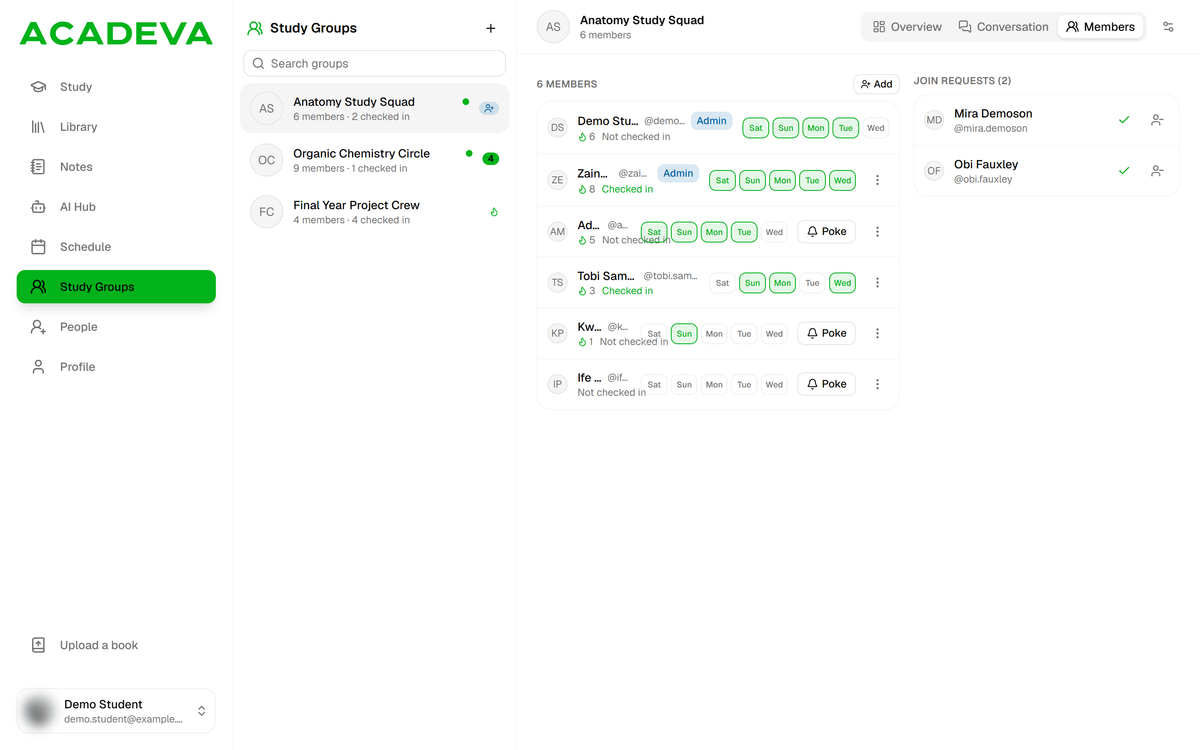
- Add people to the group.
- Accept a join request.
- Reject a join request.
- Member actions: roles and removal.
Desktop: The Members tab. Admins see Add and the Join requests column.
Add people
On Group Members, scroll to Manage and tap Add Members. Your friends are listed, and anyone already in the group is ticked and greyed out.
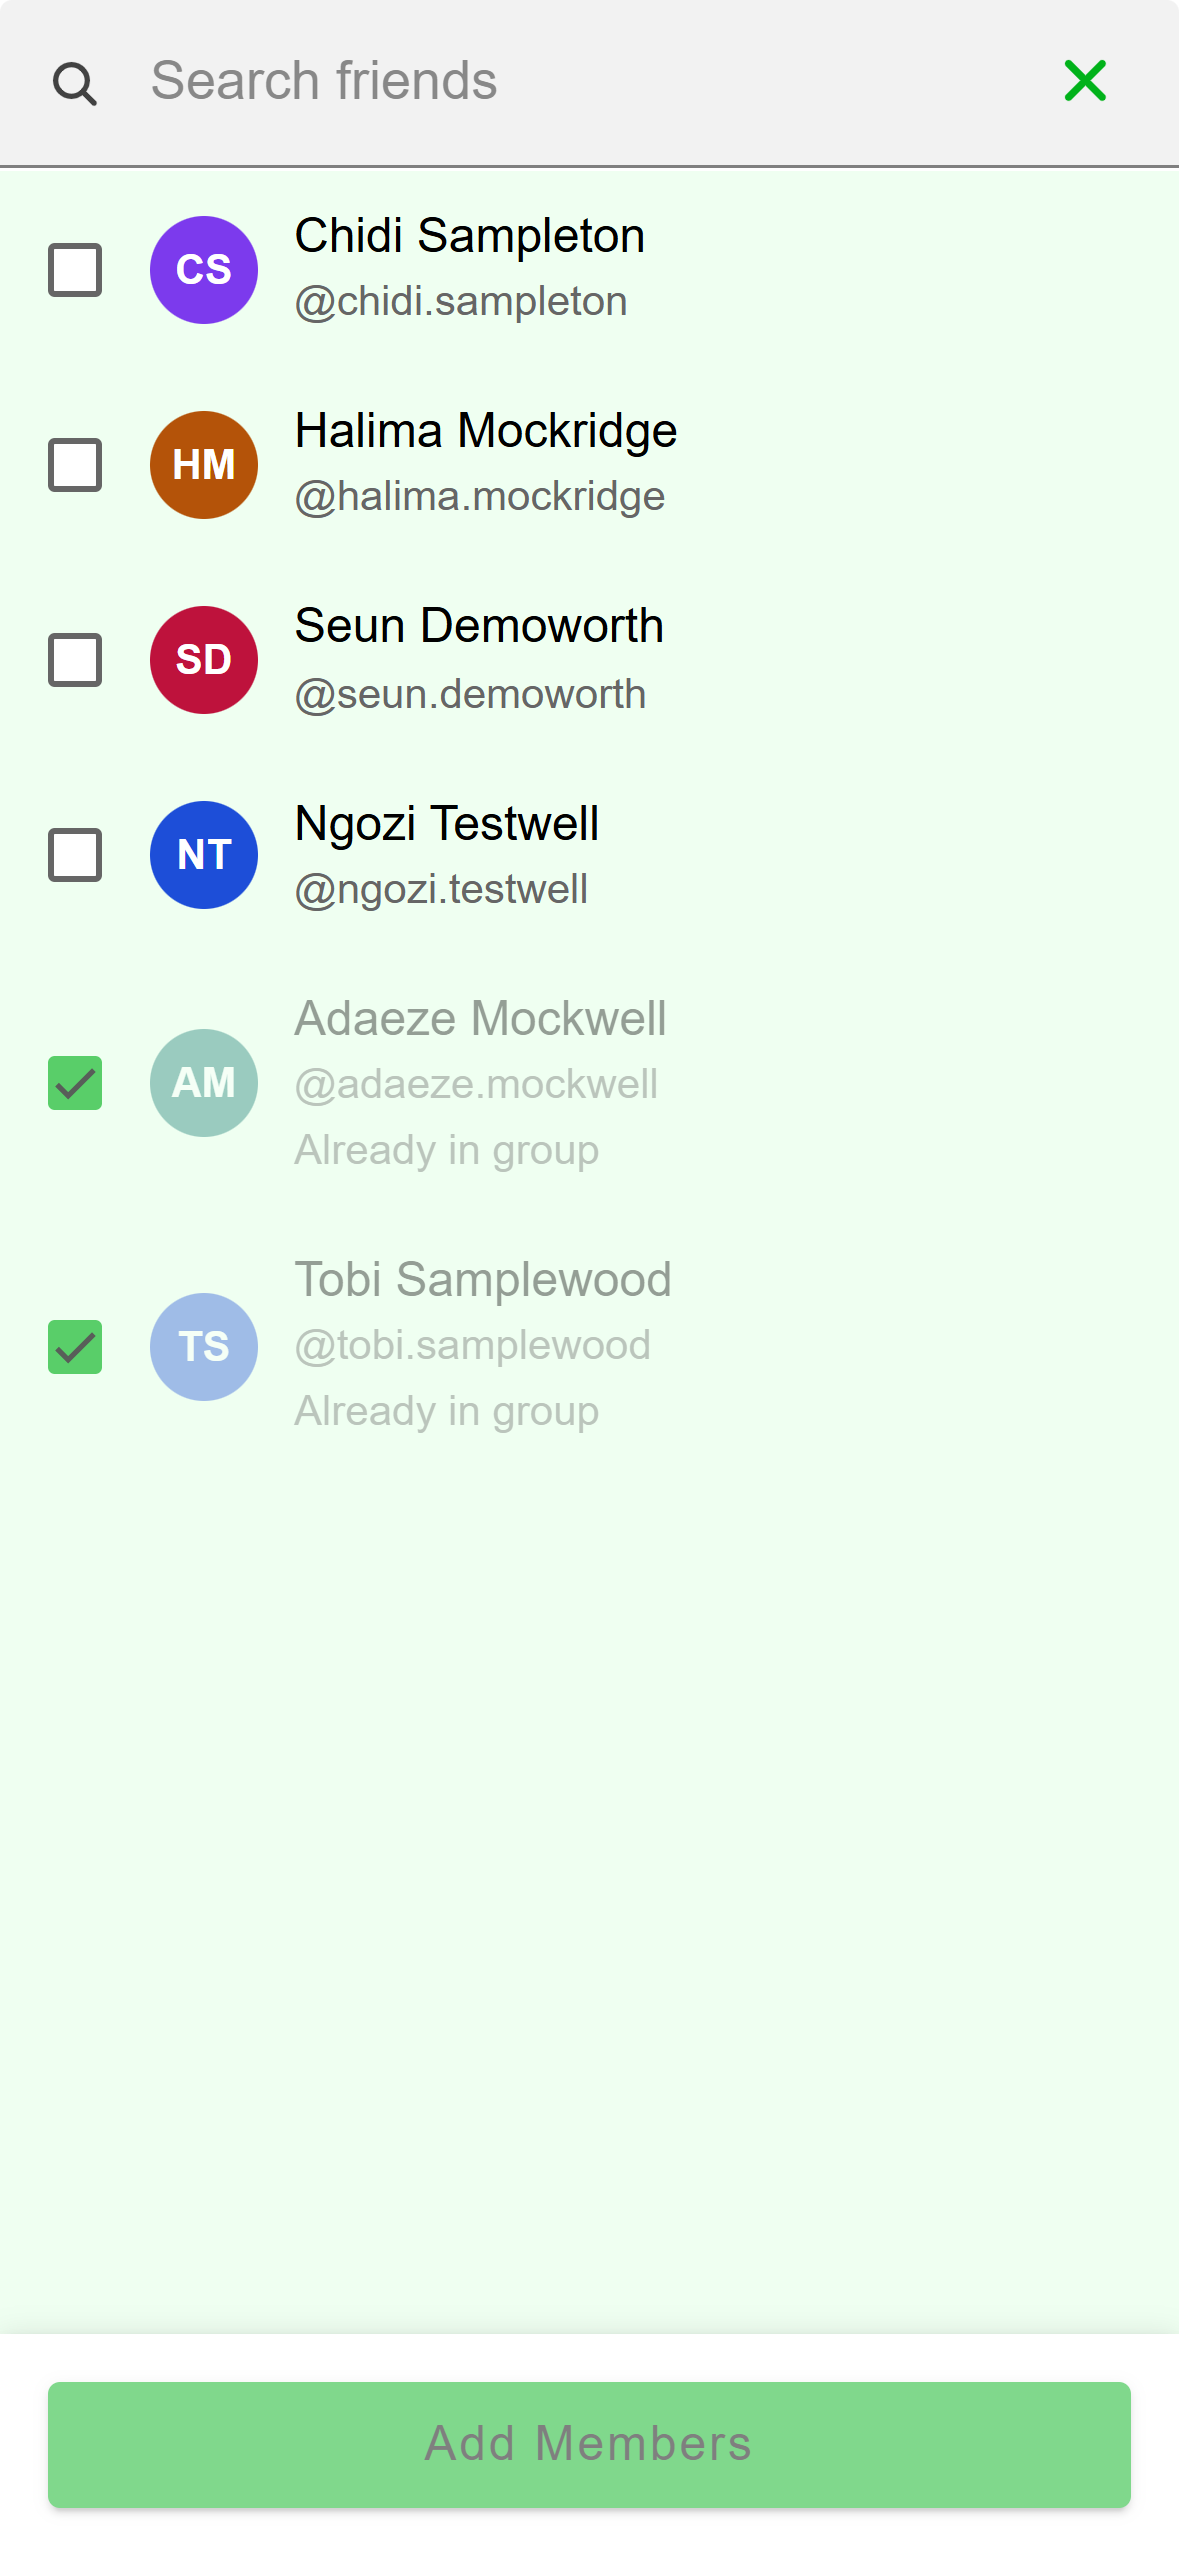
- Already in the group.
- Adds everyone you ticked.
Mobile: Tick the friends to add. Tick one or more friends and tap the button, which shows how many you picked. They join at once. You can only add friends here, so send a friend request first if you need to (see Find and connect with people).
On the Members tab, click Add. The dialog lists your friends. Type a name or exact username to find anyone else.
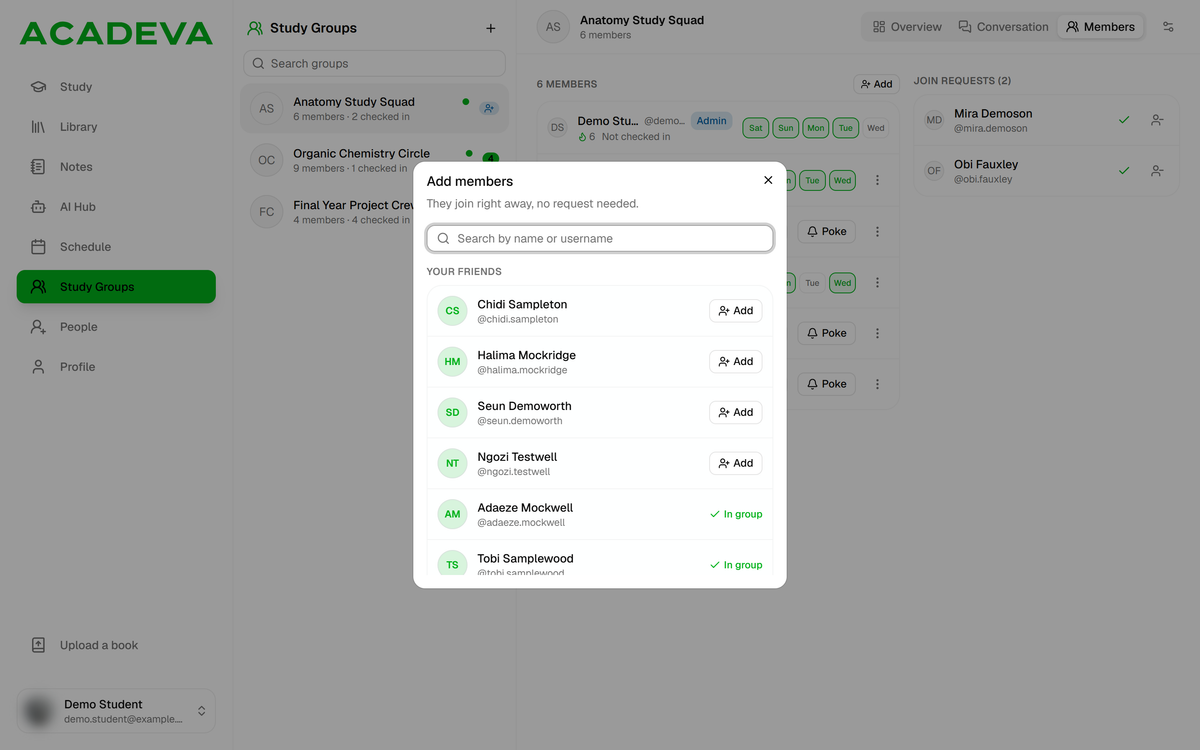
- Add puts them in the group straight away.
- Already a member.
Desktop: People already in the group show In group. Click Add beside each person. The dialog stays open, so you can add several. "They join right away, no request needed."
You can also share the invite link. It's covered below, and joining is explained in Create or join a study group.
Review join requests
People ask to join when a group approves link joins, or when they find the group on a profile (phone). Admins see those requests, and the group shows a dot in the Study groups list.
Open Group Members. Under Join Requests, tap Accept to add the person or Reject to drop the request.
Open the Members tab. Under Join requests, click the tick to accept or the person-with-minus icon to reject.
Accepting adds the person as a member. Rejecting only deletes the request, so they can ask again.
Make someone an admin or remove them
On Group Members, tap a person. The menu offers View Profile, Poke to check-in, Make Admin (or Remove from Admin) and Remove from Group.
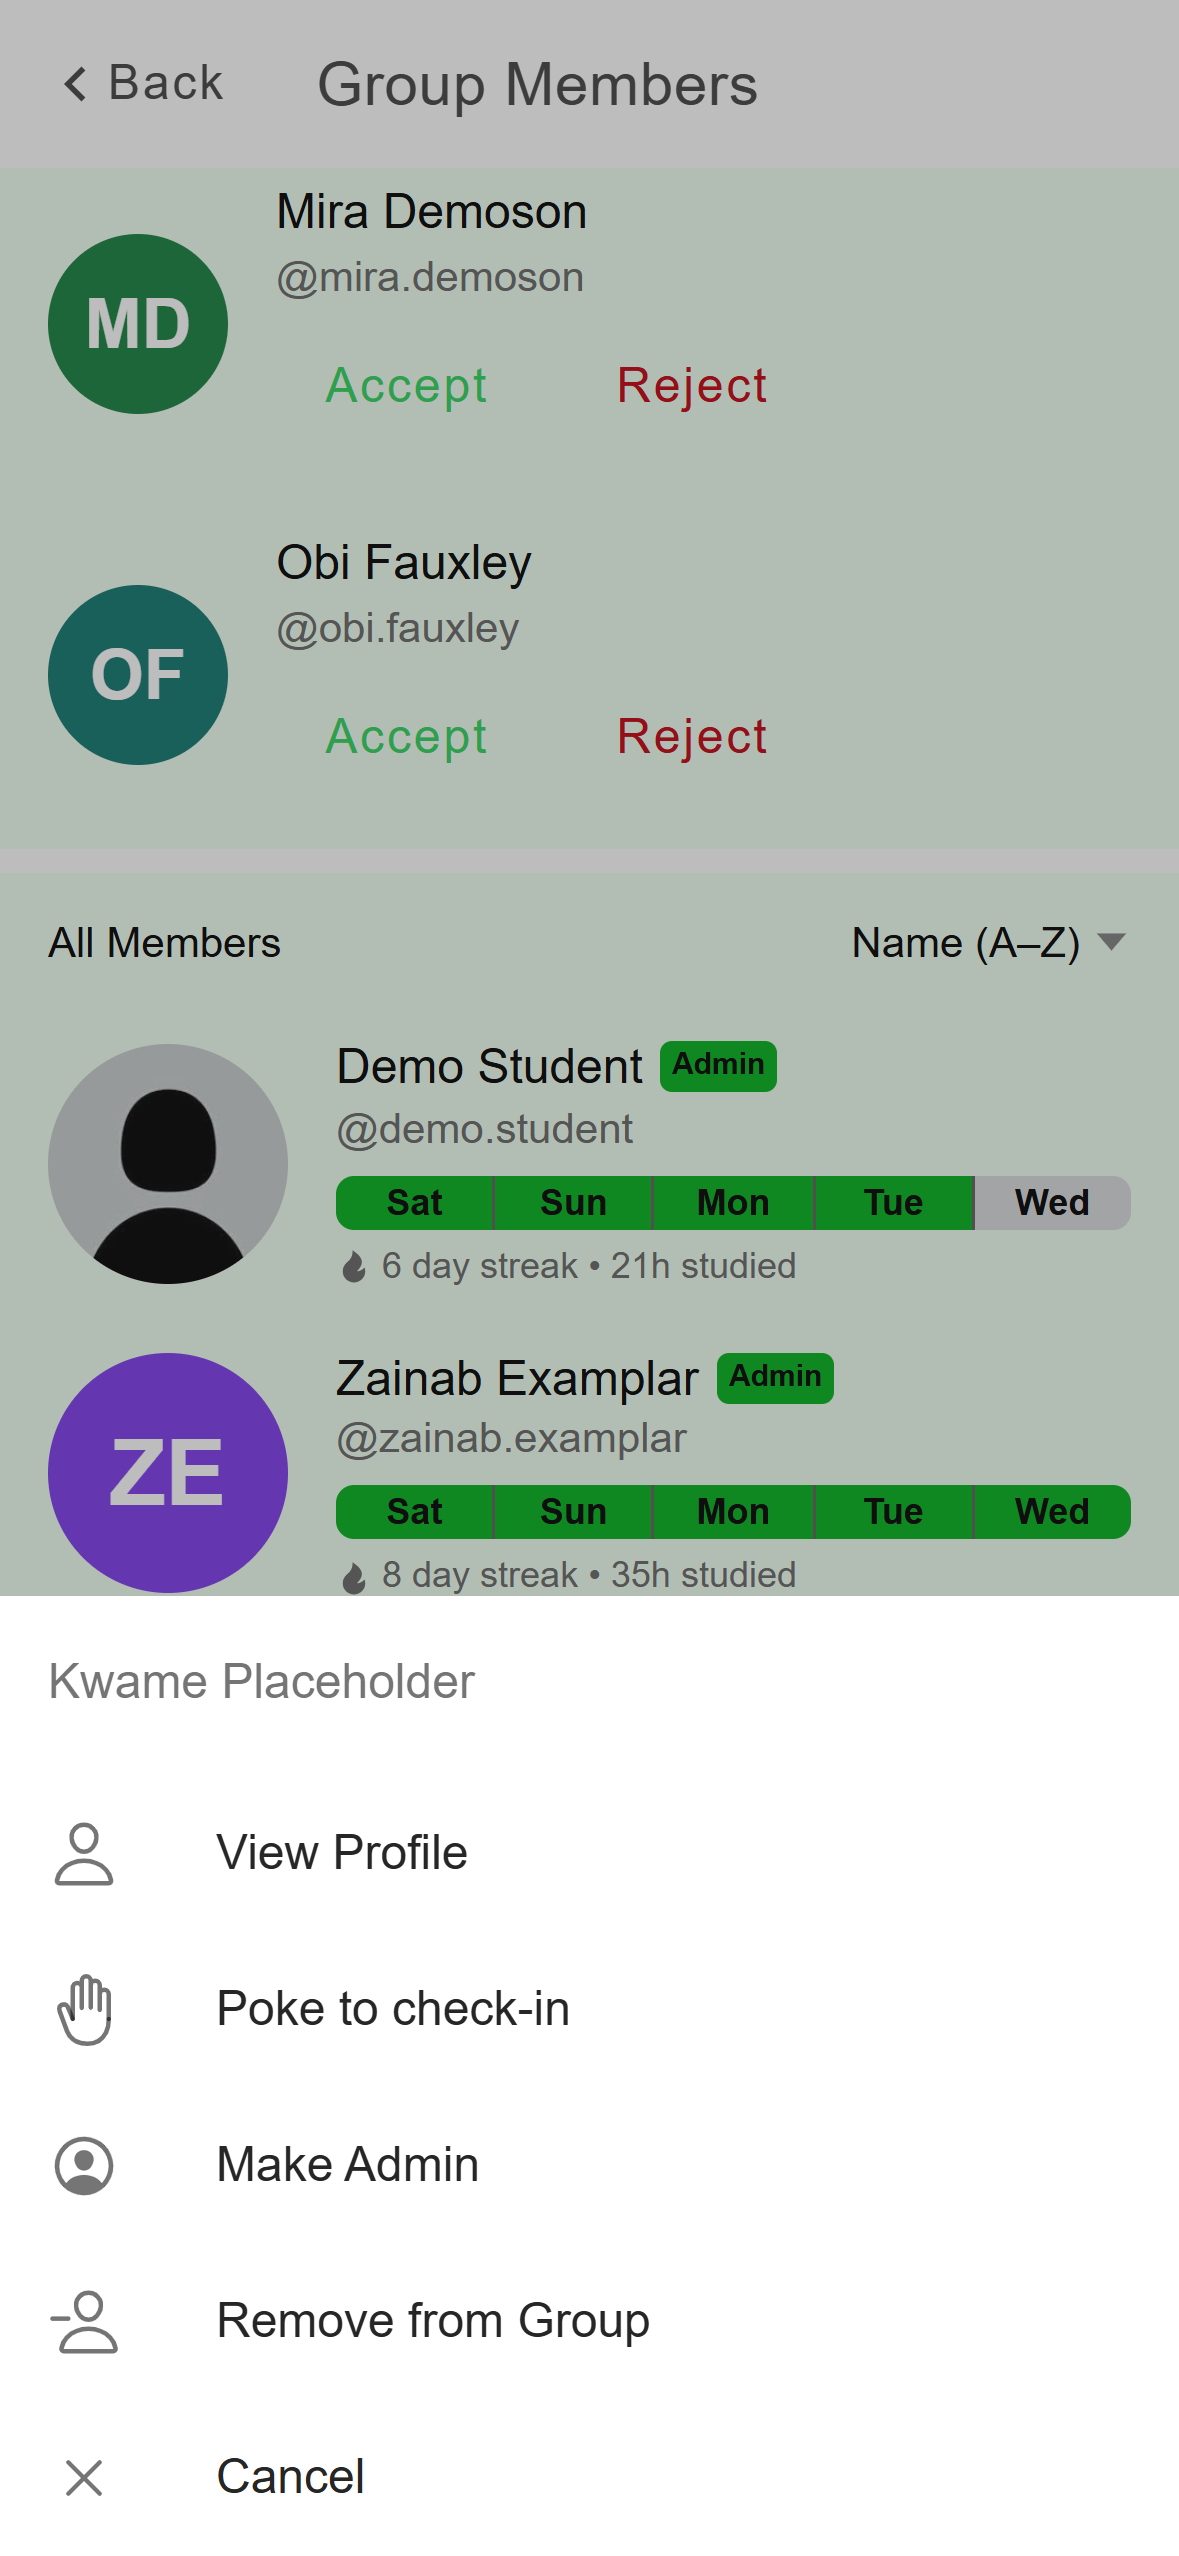
- Only shown if they haven't checked in today.
- Gives them the same controls as you.
- Removes them at once, with no question asked.
Mobile: The member menu, as an admin sees it. To clear out inactive people, sort by Streak. Under "Members with no streak" an admin gets Remove all, which asks before it acts and never removes you.
On the Members tab, click the three dots at the end of a person's row. Choose Make admin (or Remove as admin) or Remove from group.
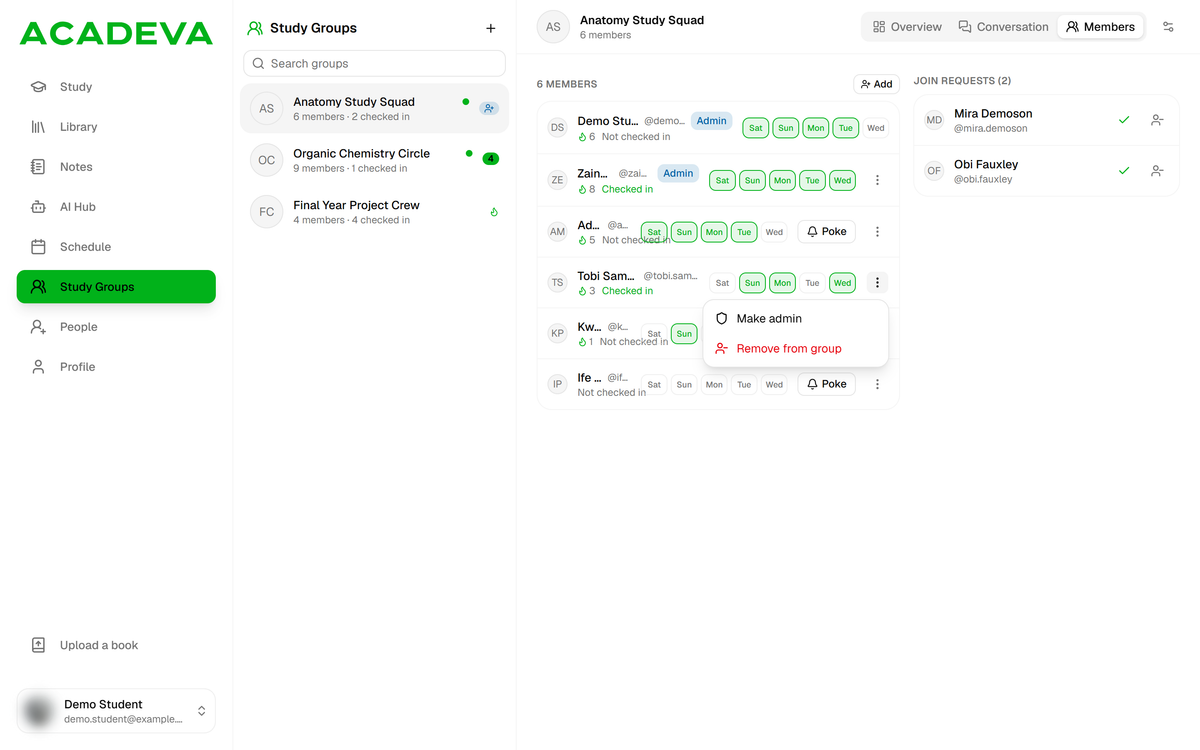
- Promote them to admin.
- Removes them at once, with no confirmation.
Desktop: The member actions menu.
Removing someone takes effect straight away. They can only come back with a new invite or your approval. You can't change your own role, because your own entry has no role options.
If the only admin leaves, Acadeva promotes another member to admin: the next person who joined after them, or the longest-standing member if nobody joined later.
Change the group settings
Tap the settings icon at the top right of the group. Change what you need, then tap Save. Save stays grey until you change something, and leaving with unsaved changes asks you to Discard or Save. The cover picture button saves on its own.
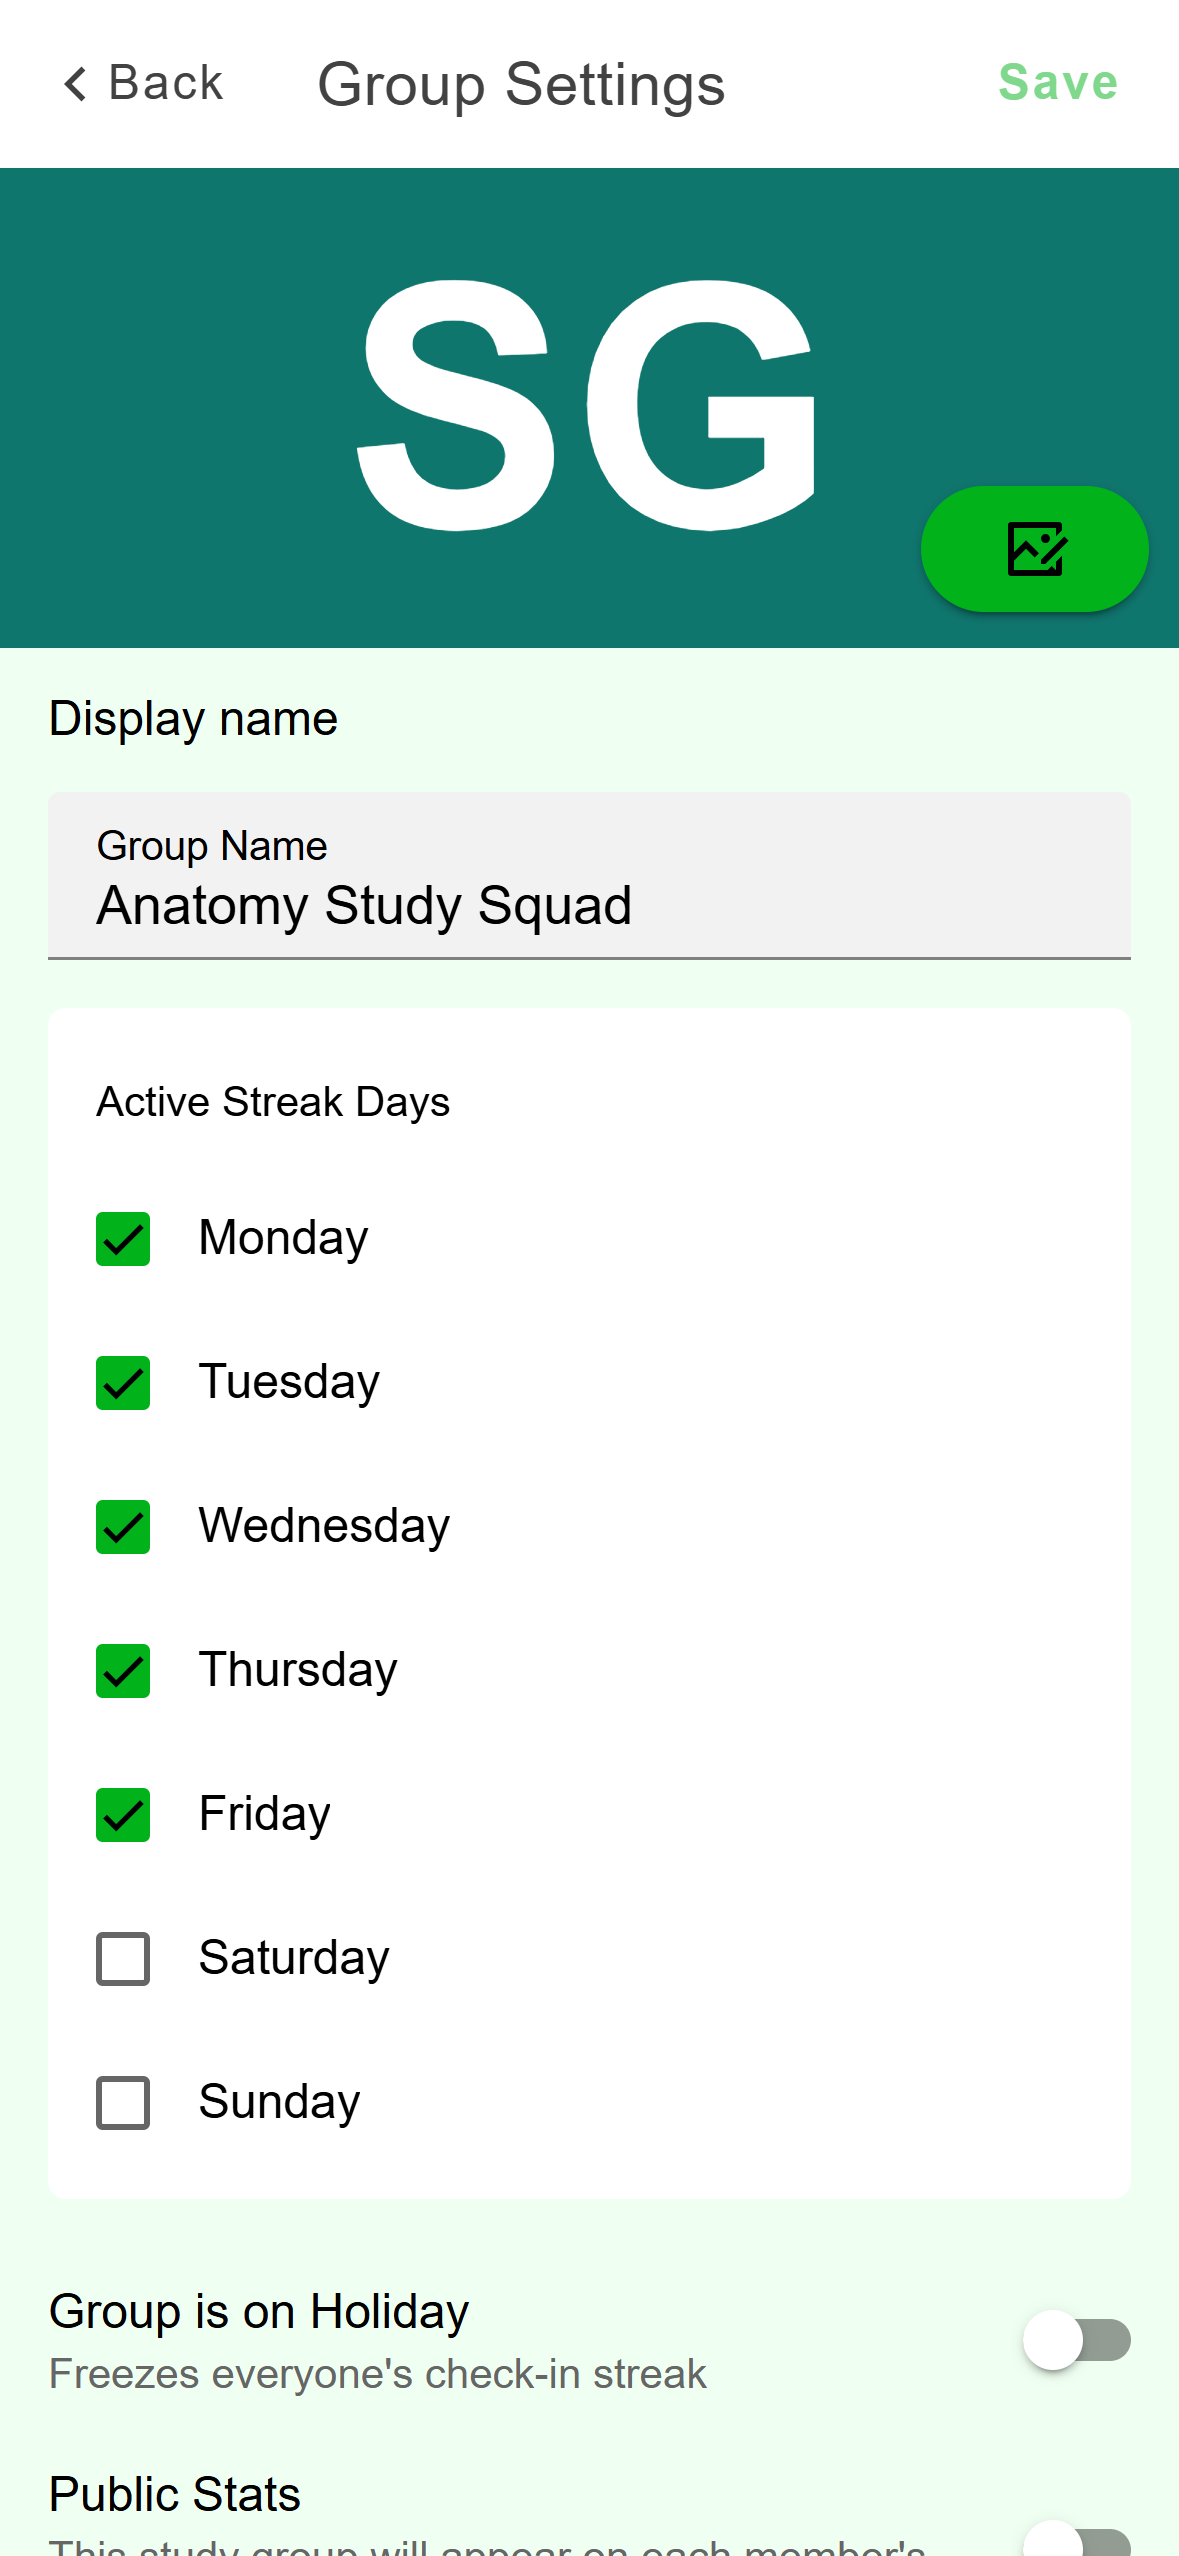
- Save turns green once something has changed.
- Change the cover picture.
Mobile: Name, cover and active streak days. Scroll down for the switches, the invite link and the Danger zone.
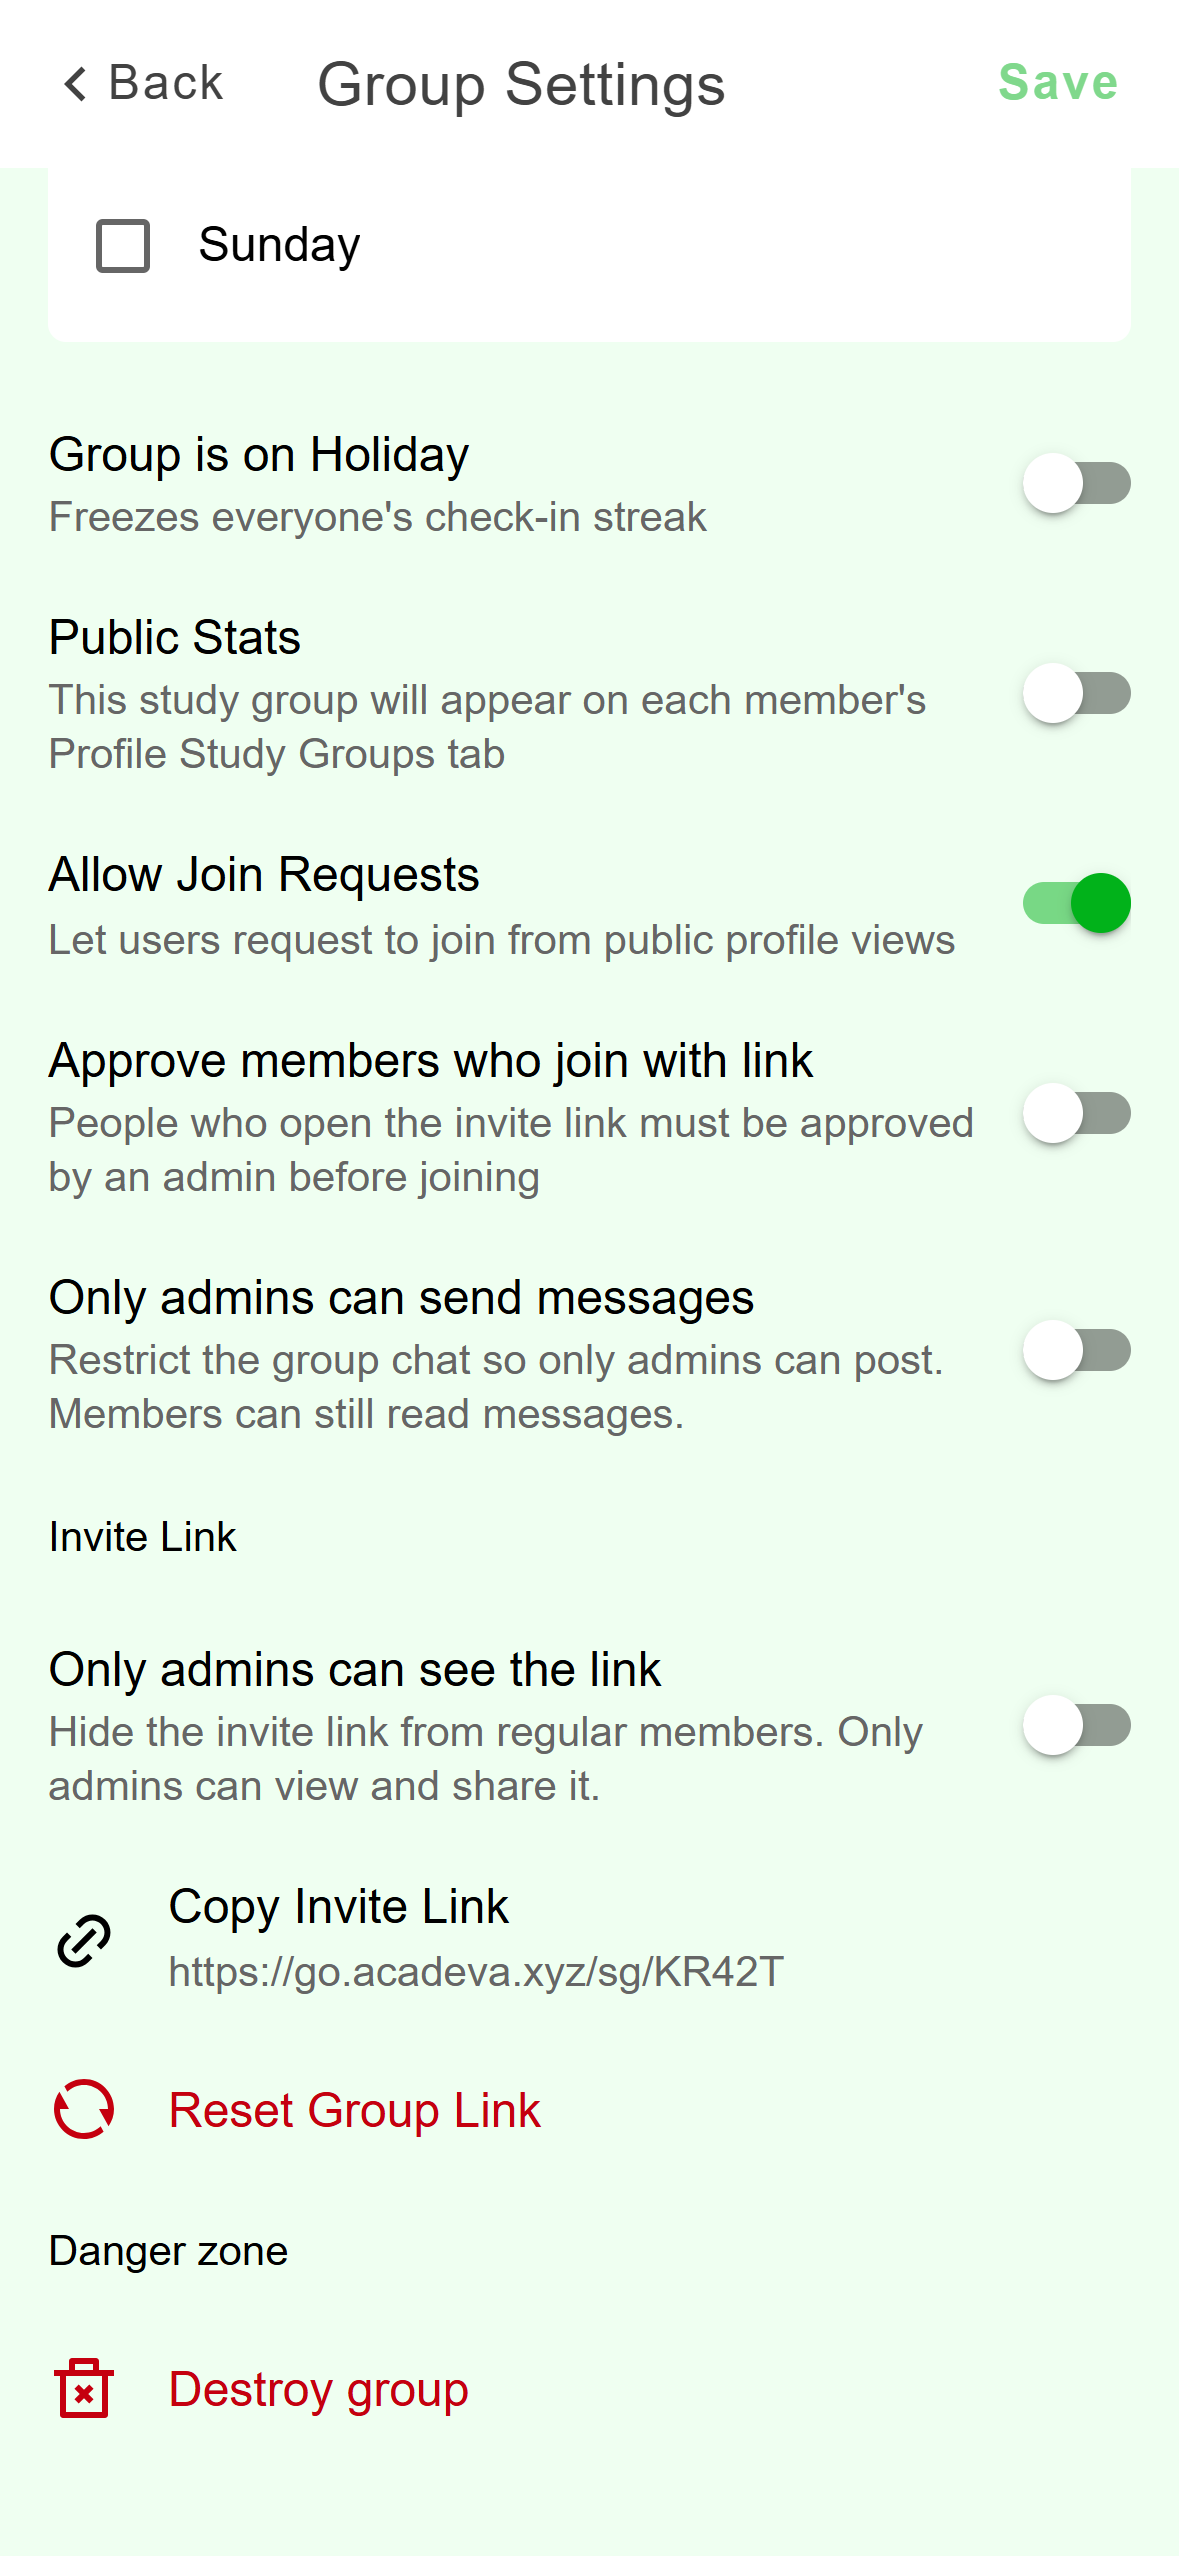
- Turn on to review everyone who joins by link.
- Cancels the old invite link.
- Deletes the group for everyone.
Mobile: Switches, invite link and Danger zone.
Members open the same screen as Group Info. It shows the settings but changes nothing.
Click the settings icon at the far right of the group header. The Group settings sheet opens over whichever tab you're on. Each change applies as soon as you make it. For the name, press Enter or click Save. Click the round picture to change the cover.
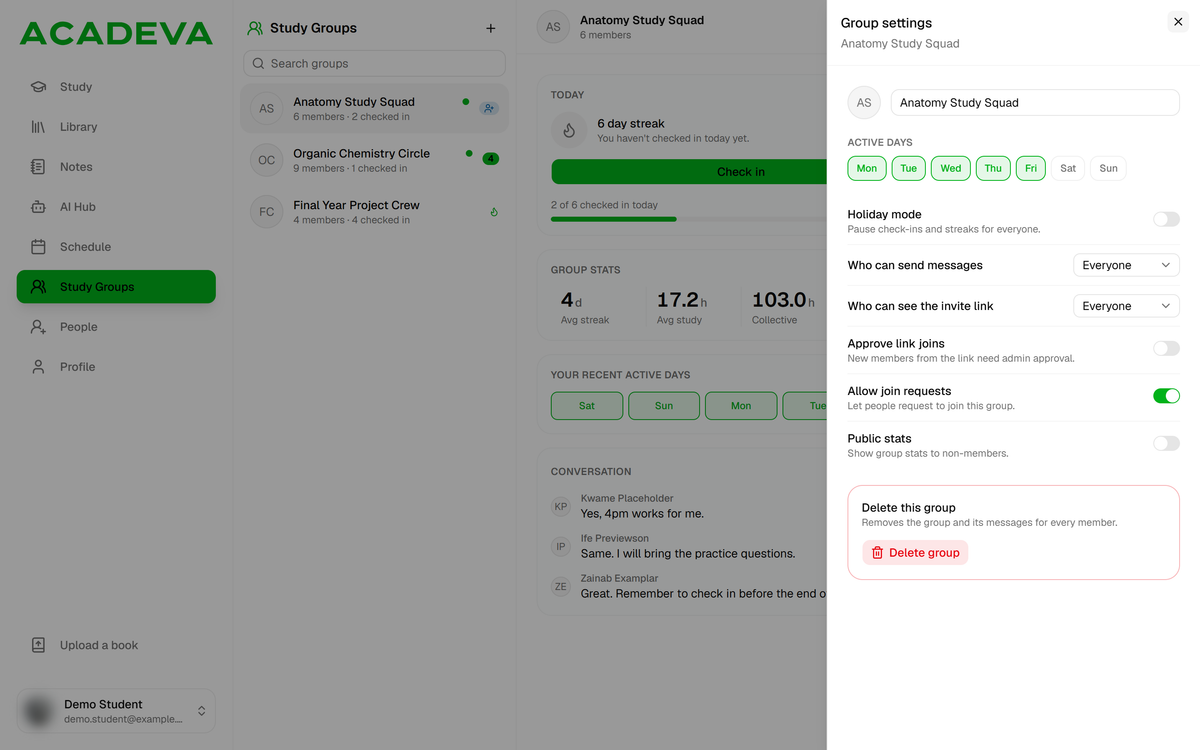
- Holiday mode.
- Everyone or Admins only.
- Everyone or Admins only.
- Turn on to review everyone who joins by link.
- Deletes the group for everyone.
Desktop: The Group settings sheet.
What each setting does:
- Name and cover. The name can be up to 60 characters.
- Active days. Only these days count toward streaks. A day you switch off never breaks one.
- Holiday. Group is on Holiday on the phone, Holiday mode on desktop. It freezes everyone's streak until you switch it off.
- Public stats. Lists the group, with its stats, on its members' profiles.
- Allow join requests. Lets people who find the group on a profile (phone) ask to join. It doesn't affect the invite link.
- Approve members who join with link. Approve link joins on desktop. When it's on, link joins become requests you accept or reject. When it's off, the link adds people at once.
- Only admins can send messages. Who can send messages on desktop. Members can still read the chat.
- Only admins can see the link. Who can see the invite link on desktop. It hides the link from members on Group Info and the Overview tab. The phone's Group Members screen still lists it, so reset the link if you need to cut one off.
Share or reset the invite link
On Group Members, under Invite Link, tap Copy Invite Link to copy it. Admins can tap Reset Group Link and confirm with Reset Link. Both are also in Group Settings.
On the Overview tab, find the Invite link panel. Click Copy link. Admins can click Reset link, which acts at once with no confirmation.
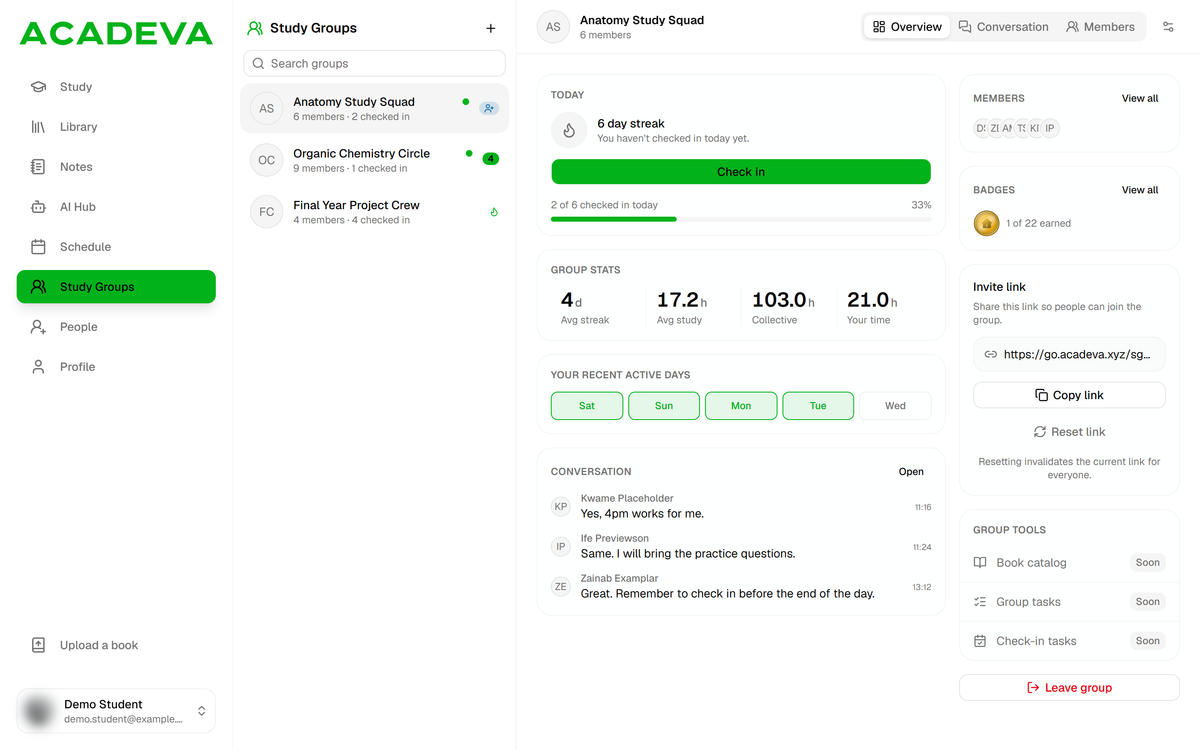
- Copy the link to share it.
- Reset link, for admins.
- Leave group asks you to confirm.
Desktop: The Invite link panel and Leave group.
A reset makes a new code, and the old link stops working for everyone. People already in the group stay.
Leave or delete the group
To leave, open Group Members, tap Leave Group and confirm with Leave. The app reloads to your You tab. To delete the group, admins open Group Settings and tap Destroy group under Danger zone, then Destroy.
To leave, click Leave group on the Overview tab and confirm. To delete the group, admins open Group settings, click Delete group and confirm.
Deleting a group removes the group, its members and its messages for everyone, and it can't be undone.
If it doesn't work
- You can't find the controls. Only admins see them. Ask an admin to make you one.
- "Admin access required". Your role has changed. Go back, reopen the group and check your badge.
- "User is already a member" or "User not found" when adding. The person is already in, or the username is wrong. Search by exact username.
- "Failed to save" or "Network error" on the phone. Check your connection and tap Save again. Your changes stay on screen until you leave it.
On desktop, a failed change shows an error message and the setting jumps back to its old value.