
A timetable is a named bundle of agendas, such as one semester. It is optional: your Schedule shows every agenda you own or have joined whether or not it sits in a timetable. What a timetable gives you is one thing to name, keep together, and share. If you have not read it yet, the article on how agendas, timetables, and periods fit together explains the idea.
The pictures use a made-up account with made-up courses. Yours will show your own agendas and timetables.
Before you start
- Make the agendas first. A timetable holds agendas and has no periods of its own. The steps are in Create an agenda and add periods.
- Be online when you create the timetable, because Acadeva sets it up on its servers. Changing it afterwards is saved on your device first and sent when you are connected.
Step 1: Create the timetable
Open the Schedule tab, tap Manage, then tap Create new timetable. If you see Just a moment, wait for your schedule to finish loading first.
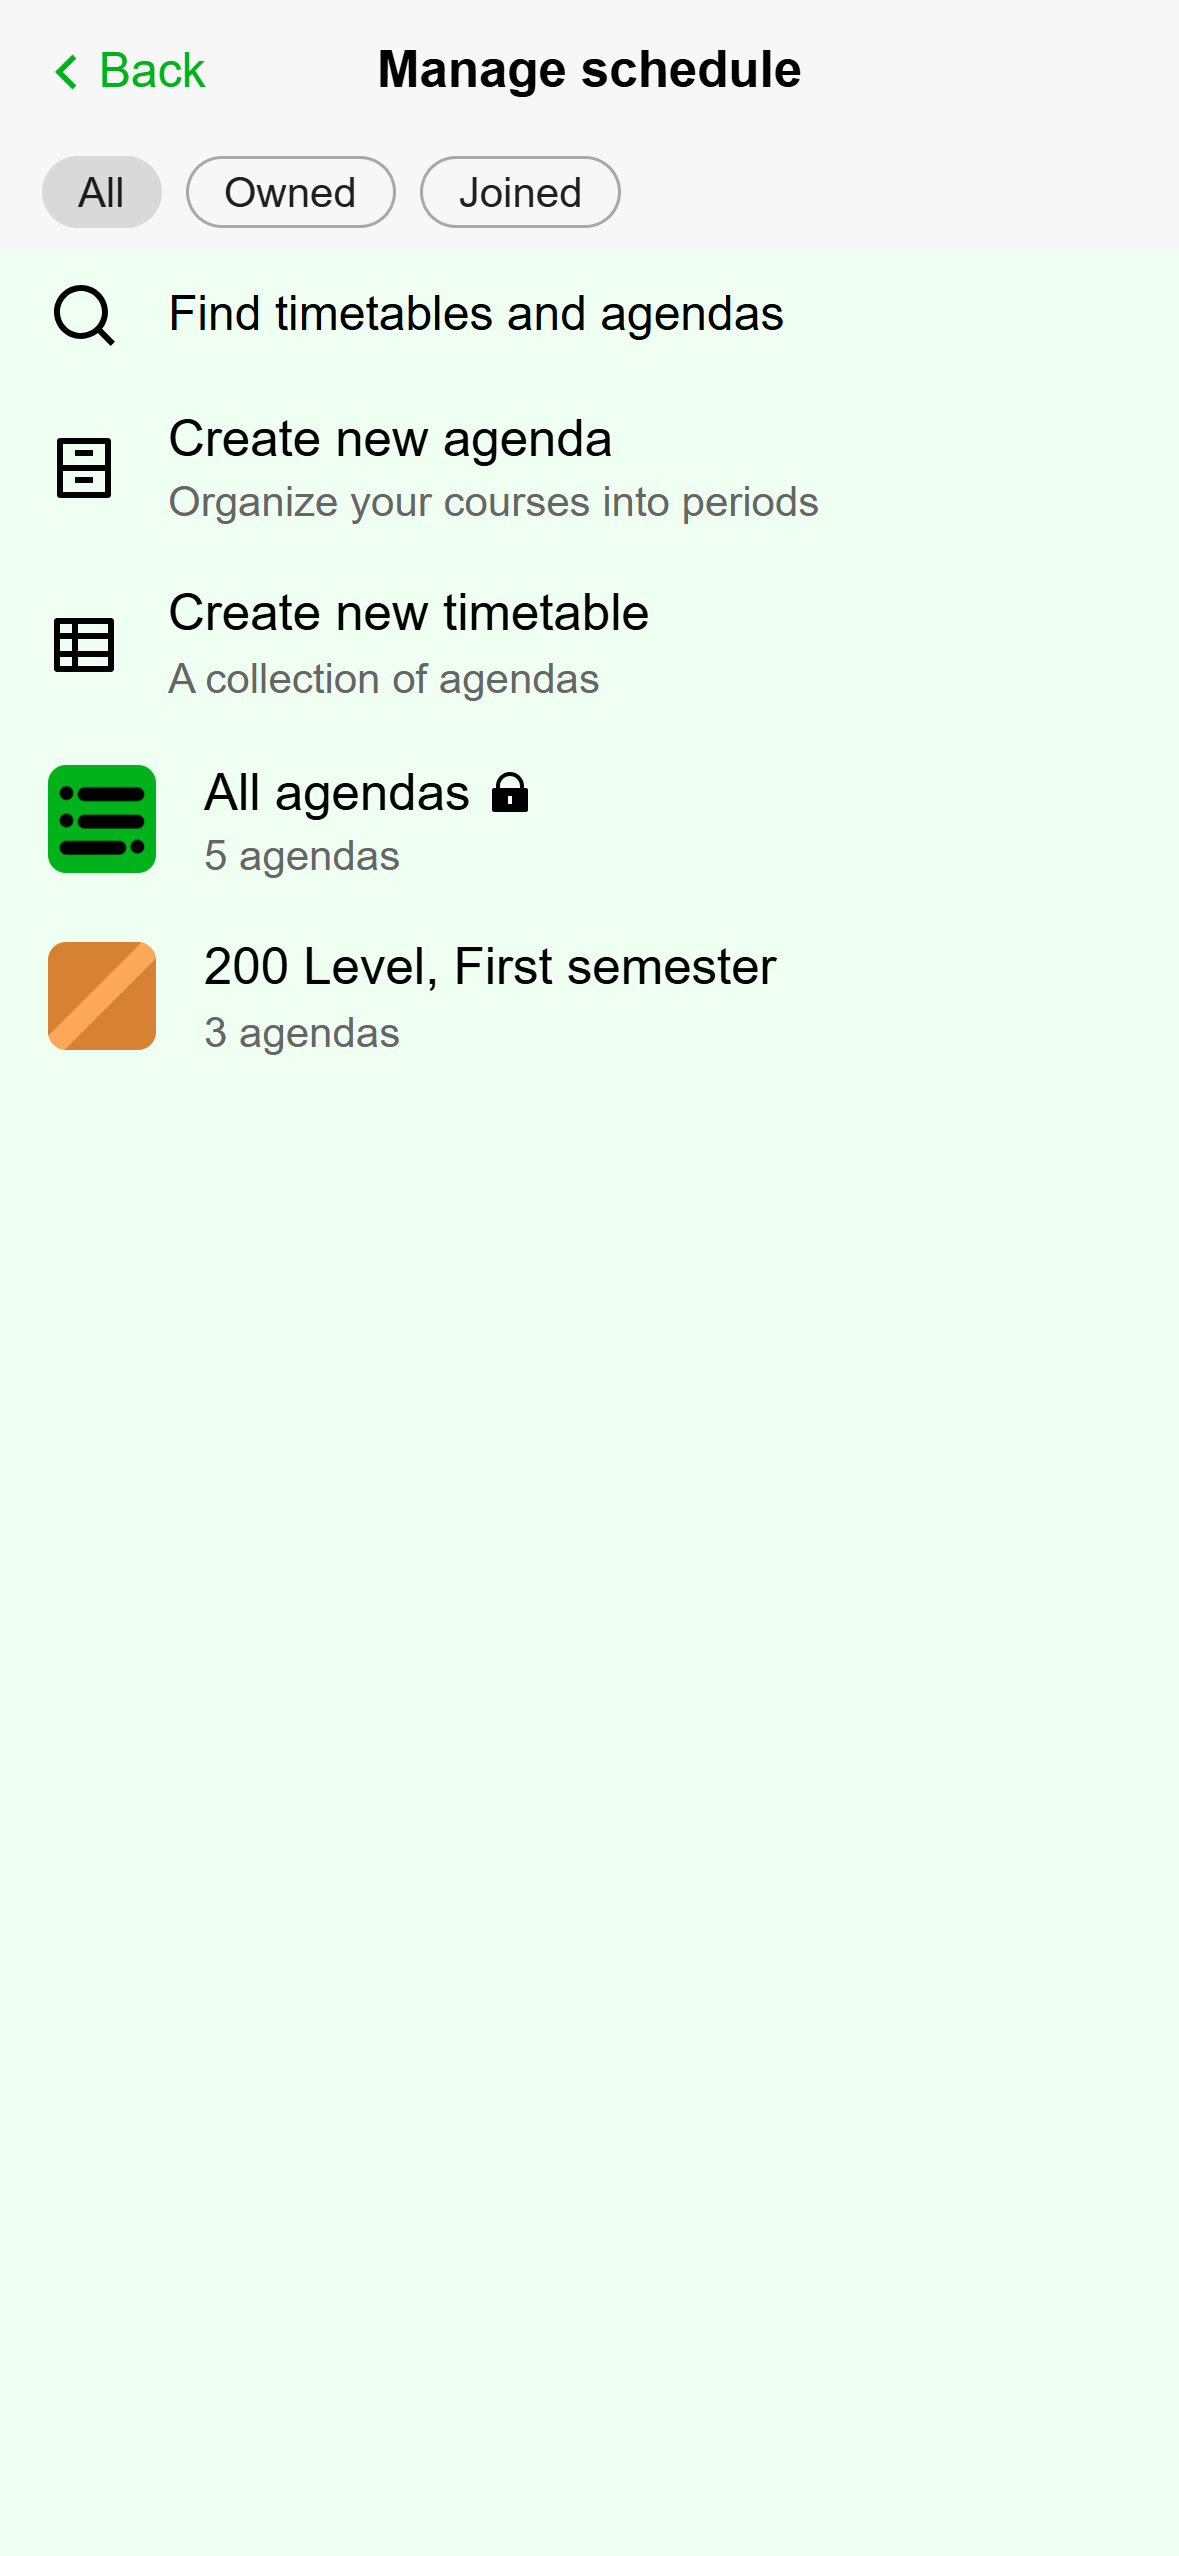
- Create new timetable.
- Your timetables are listed under All agendas.
Mobile: Manage schedule on the phone. Type a Timetable name. That is the only required field, and Finish stays off until you type one. You can also add a Description (Optional) of up to 60 characters and an Entry year (Admission), such as 2022.
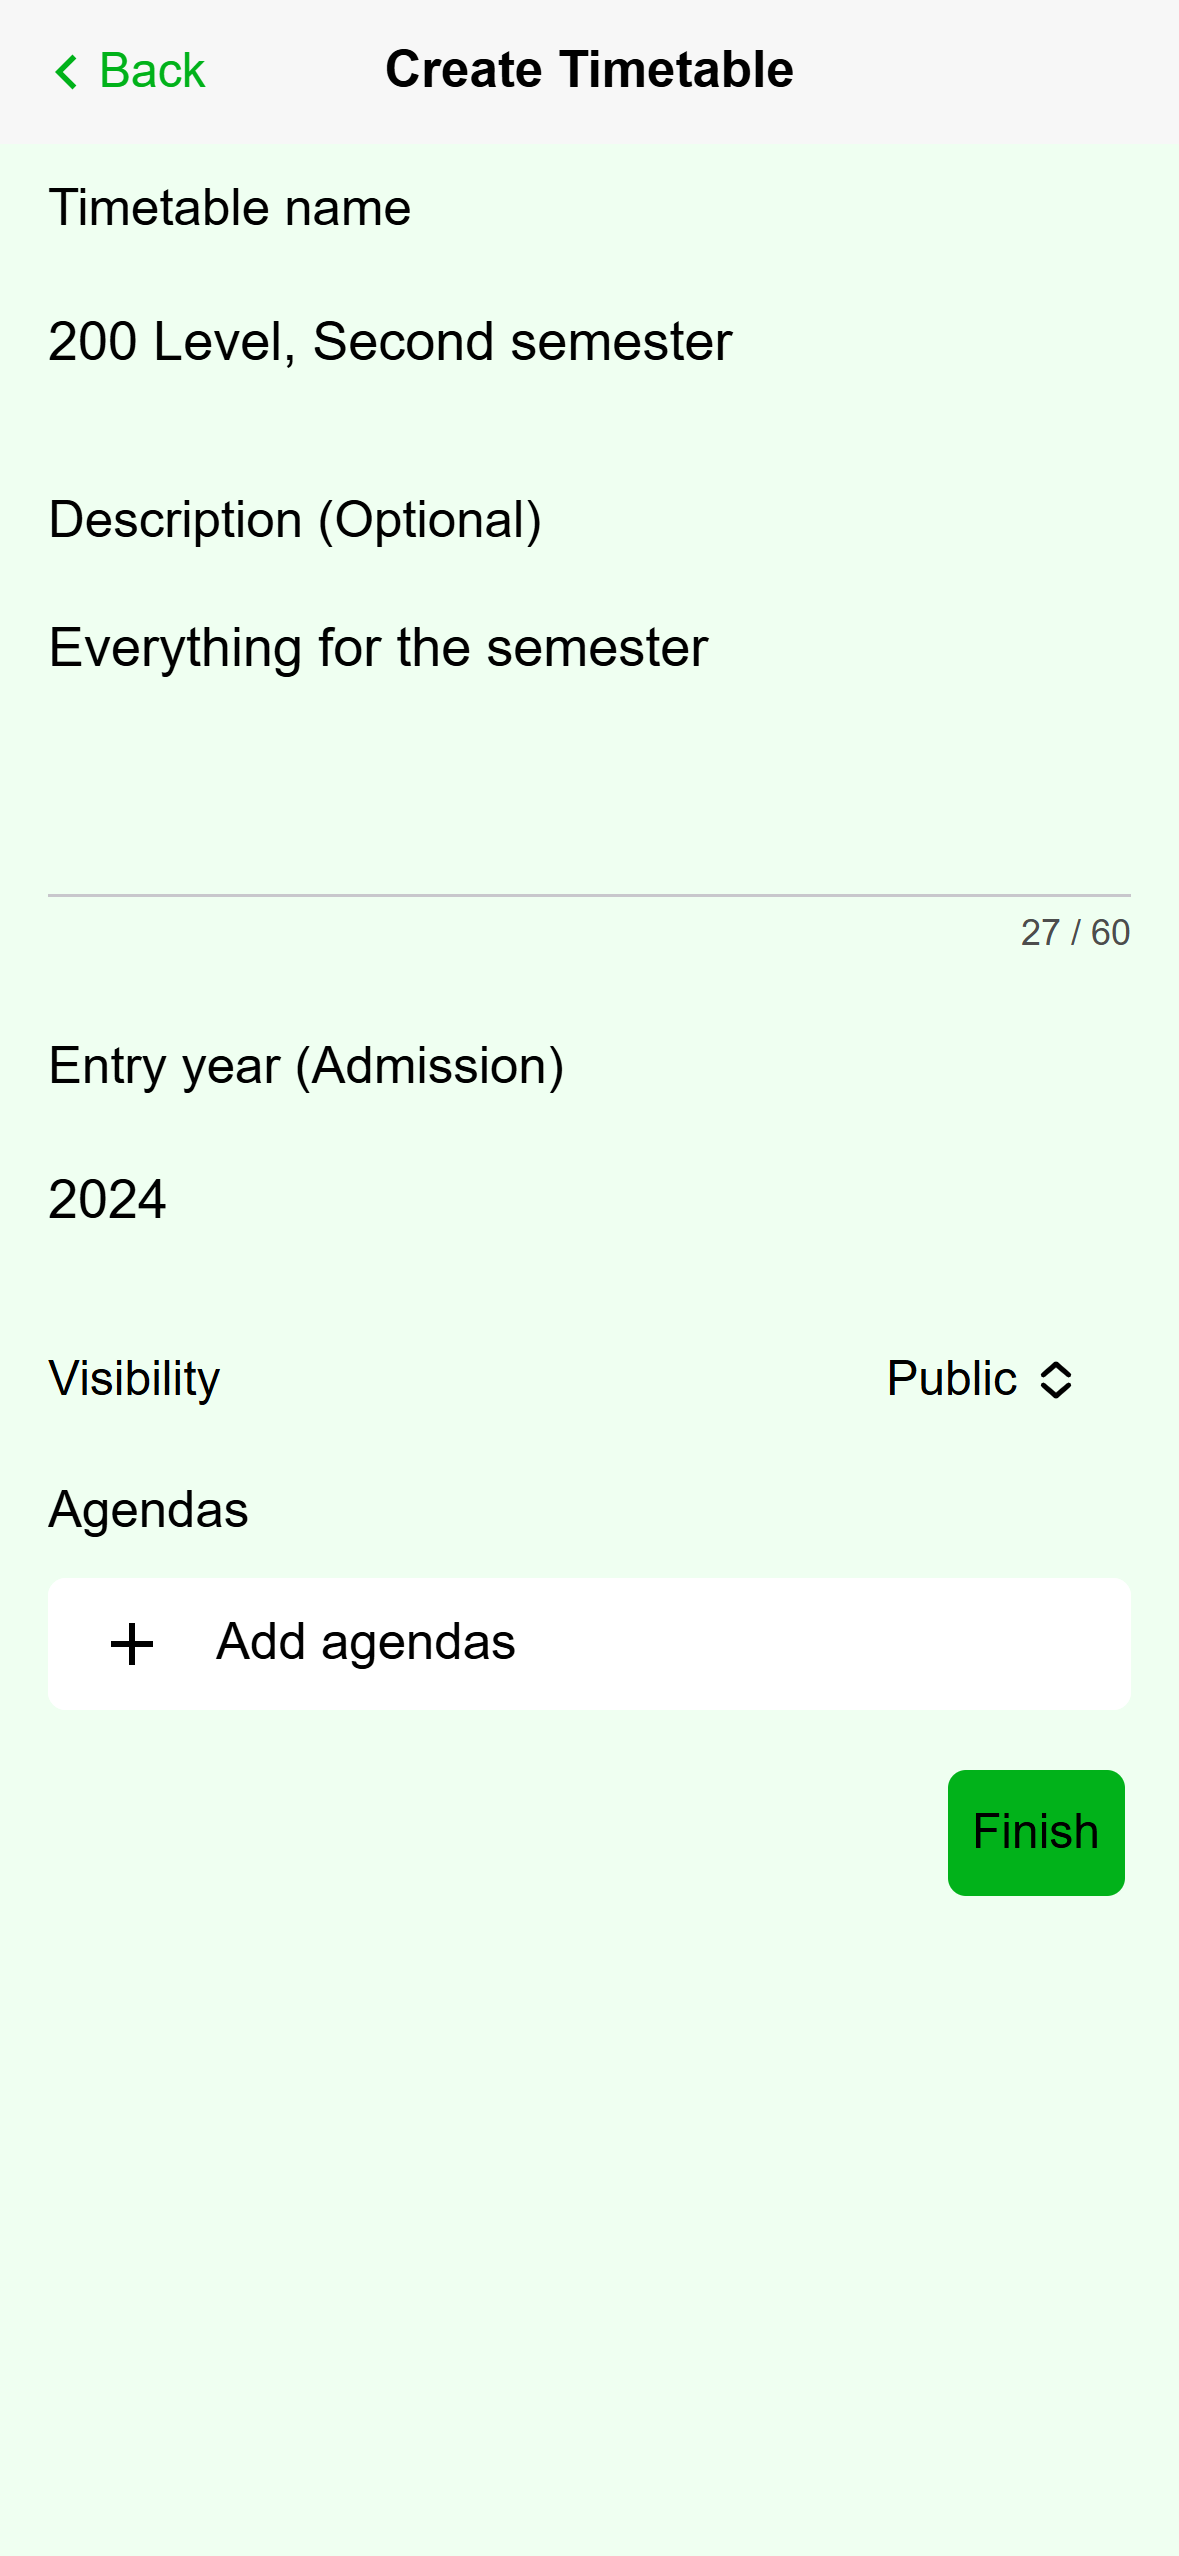
- The name is required.
- Public or Only you.
- Tap Add agendas to fill the timetable.
- Tap Finish when you are done.
Mobile: The Create Timetable form. Set Visibility. Public lets other people find the timetable when they search. Only you keeps it out of search. The phone starts on Public.
Tap Add agendas. A sheet called Add to timetable from offers two sources: Owned & joined agendas and Search for an agenda.
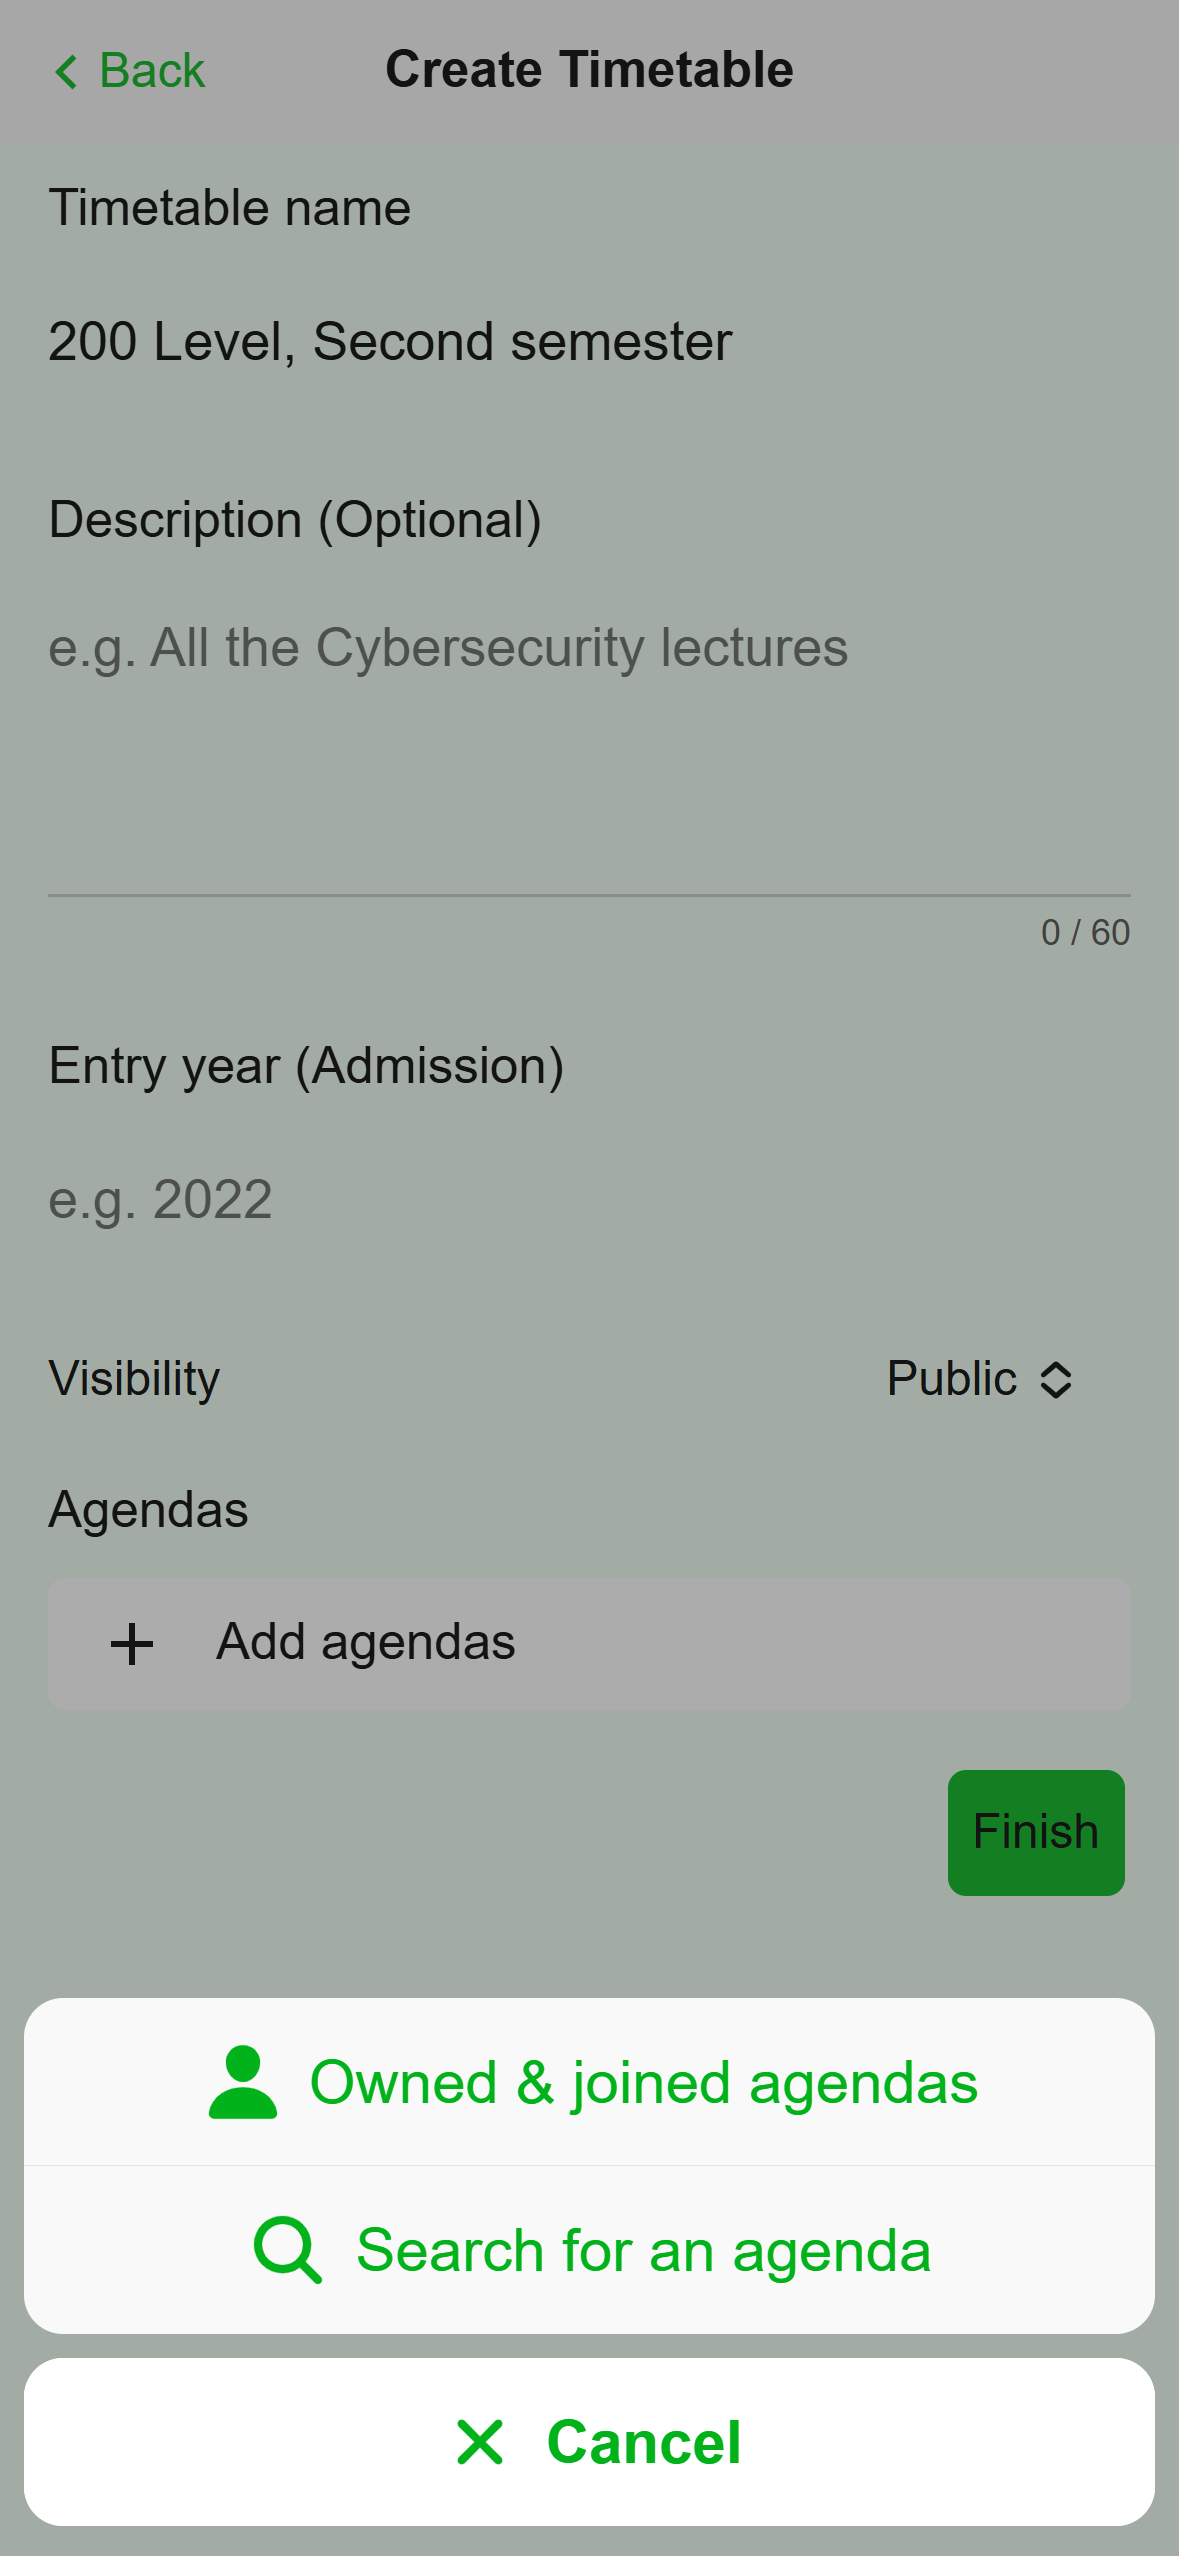
- Agendas you own or have joined.
- Public agendas that belong to someone else.
Mobile: Choose where the agenda comes from. For one of your own agendas, tap Owned & joined agendas. The Pick an agenda screen lists every agenda you own or joined that is not in the timetable yet. Tap one and the app goes back to the form with it added. Repeat for each agenda.
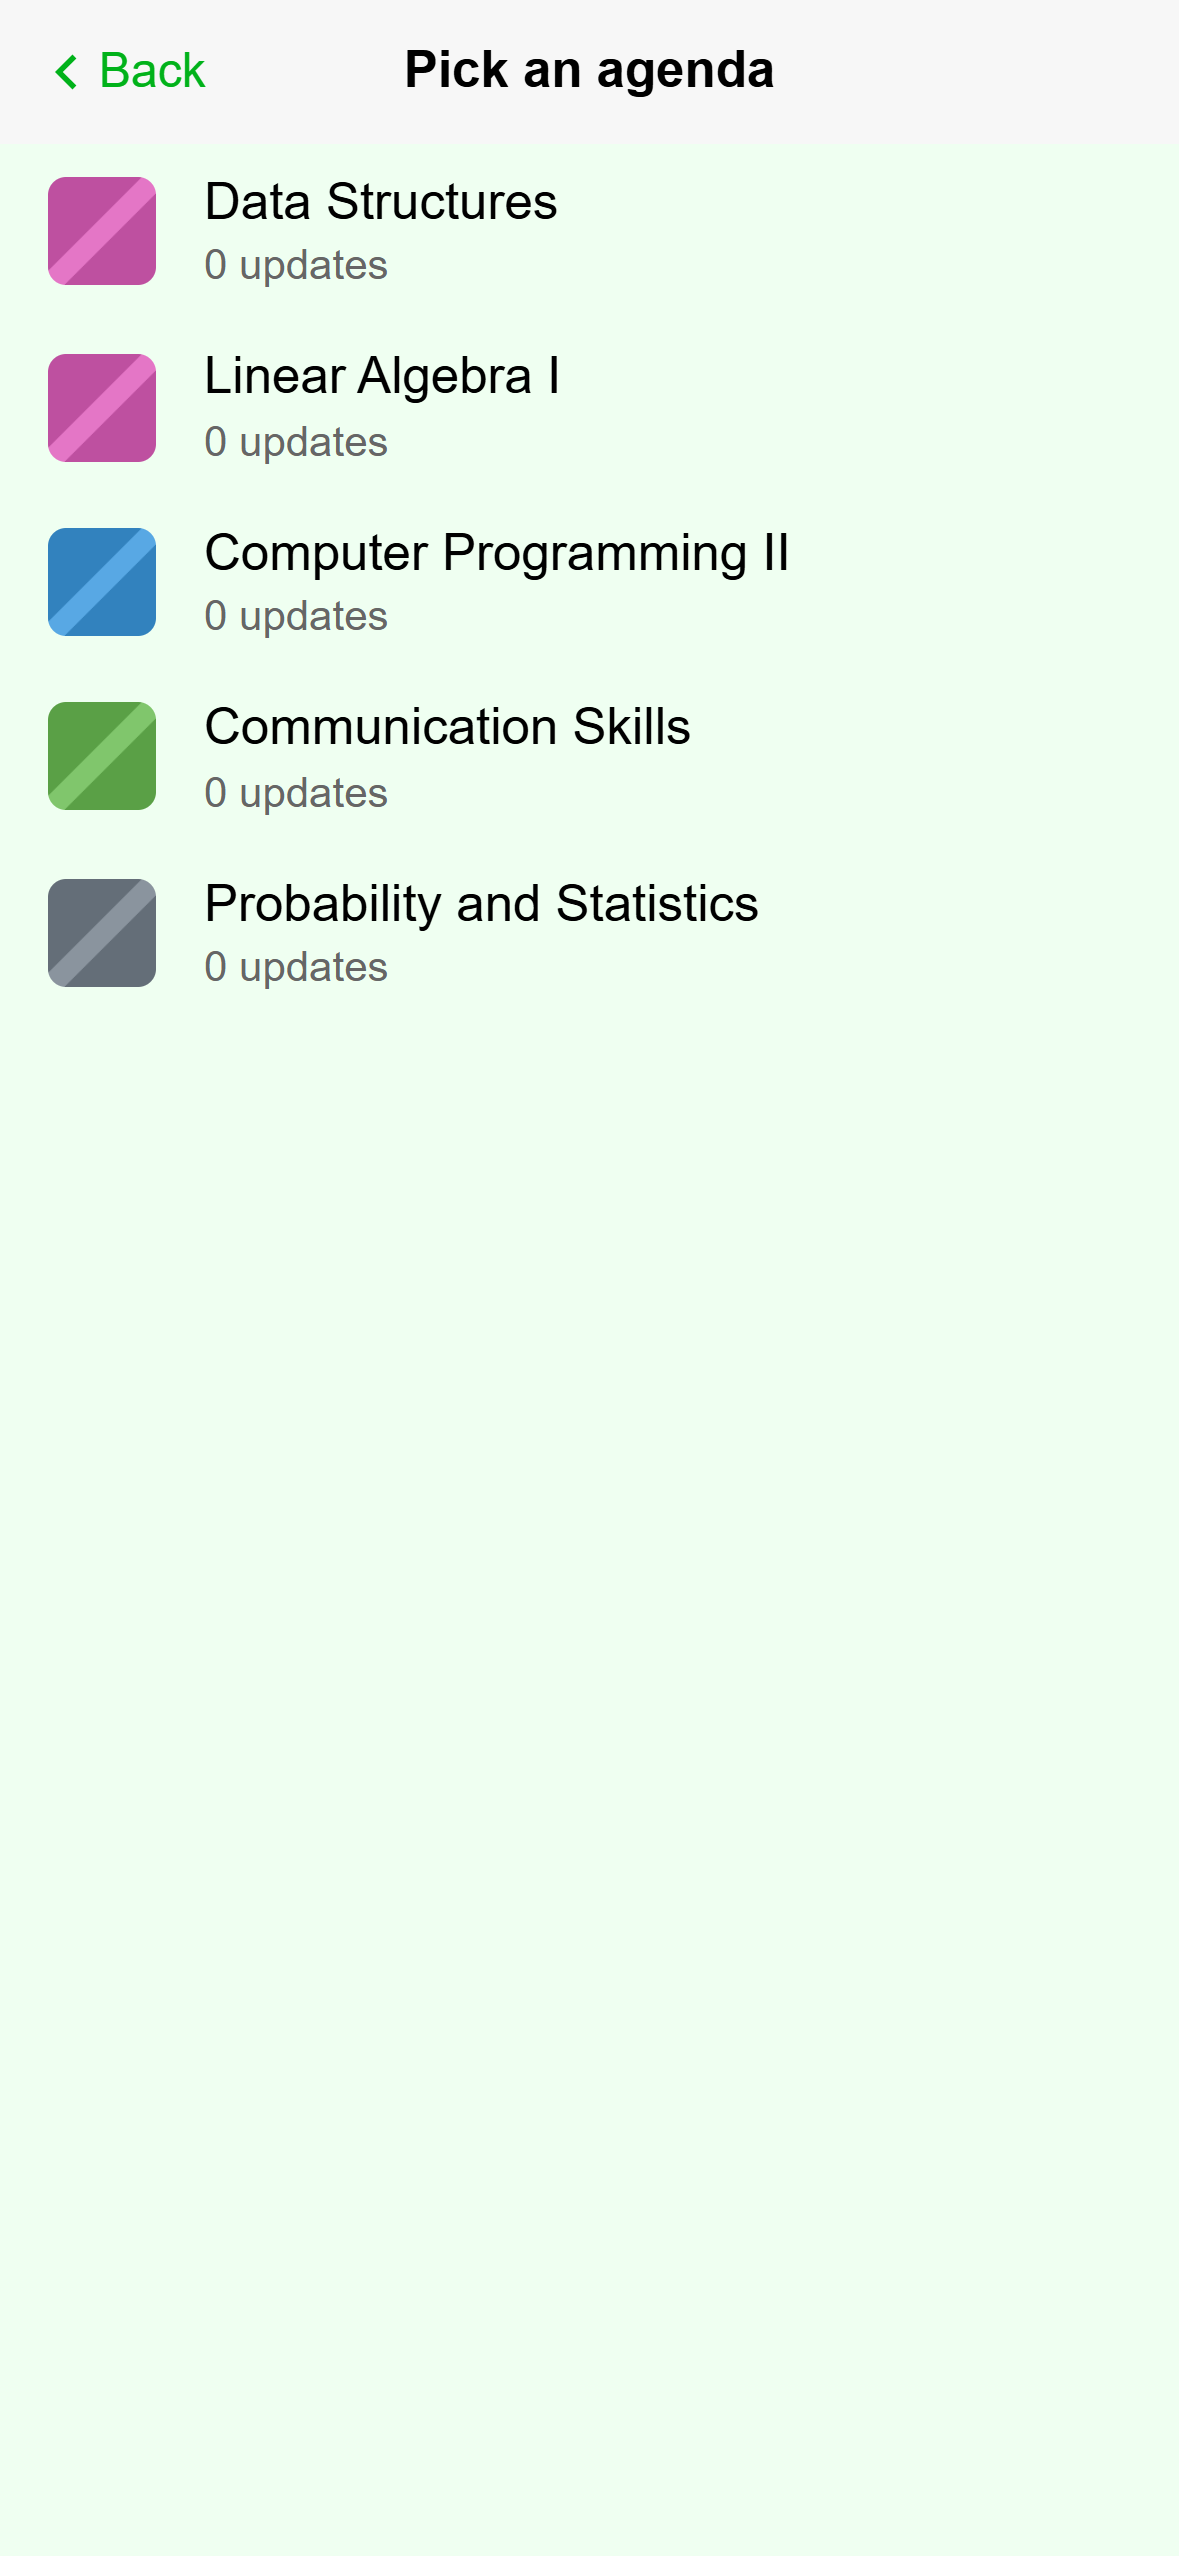
- Tap an agenda to add it. Ones you already added are not listed.
Mobile: Tap an agenda to add it. For an agenda that someone else made, tap Search for an agenda. Type its name, its tag, or its owner's username, then tap the magnifier or press Enter, and tap a result to add it. A search by name finds public agendas only. If nothing matches you see No agendas found for that search.
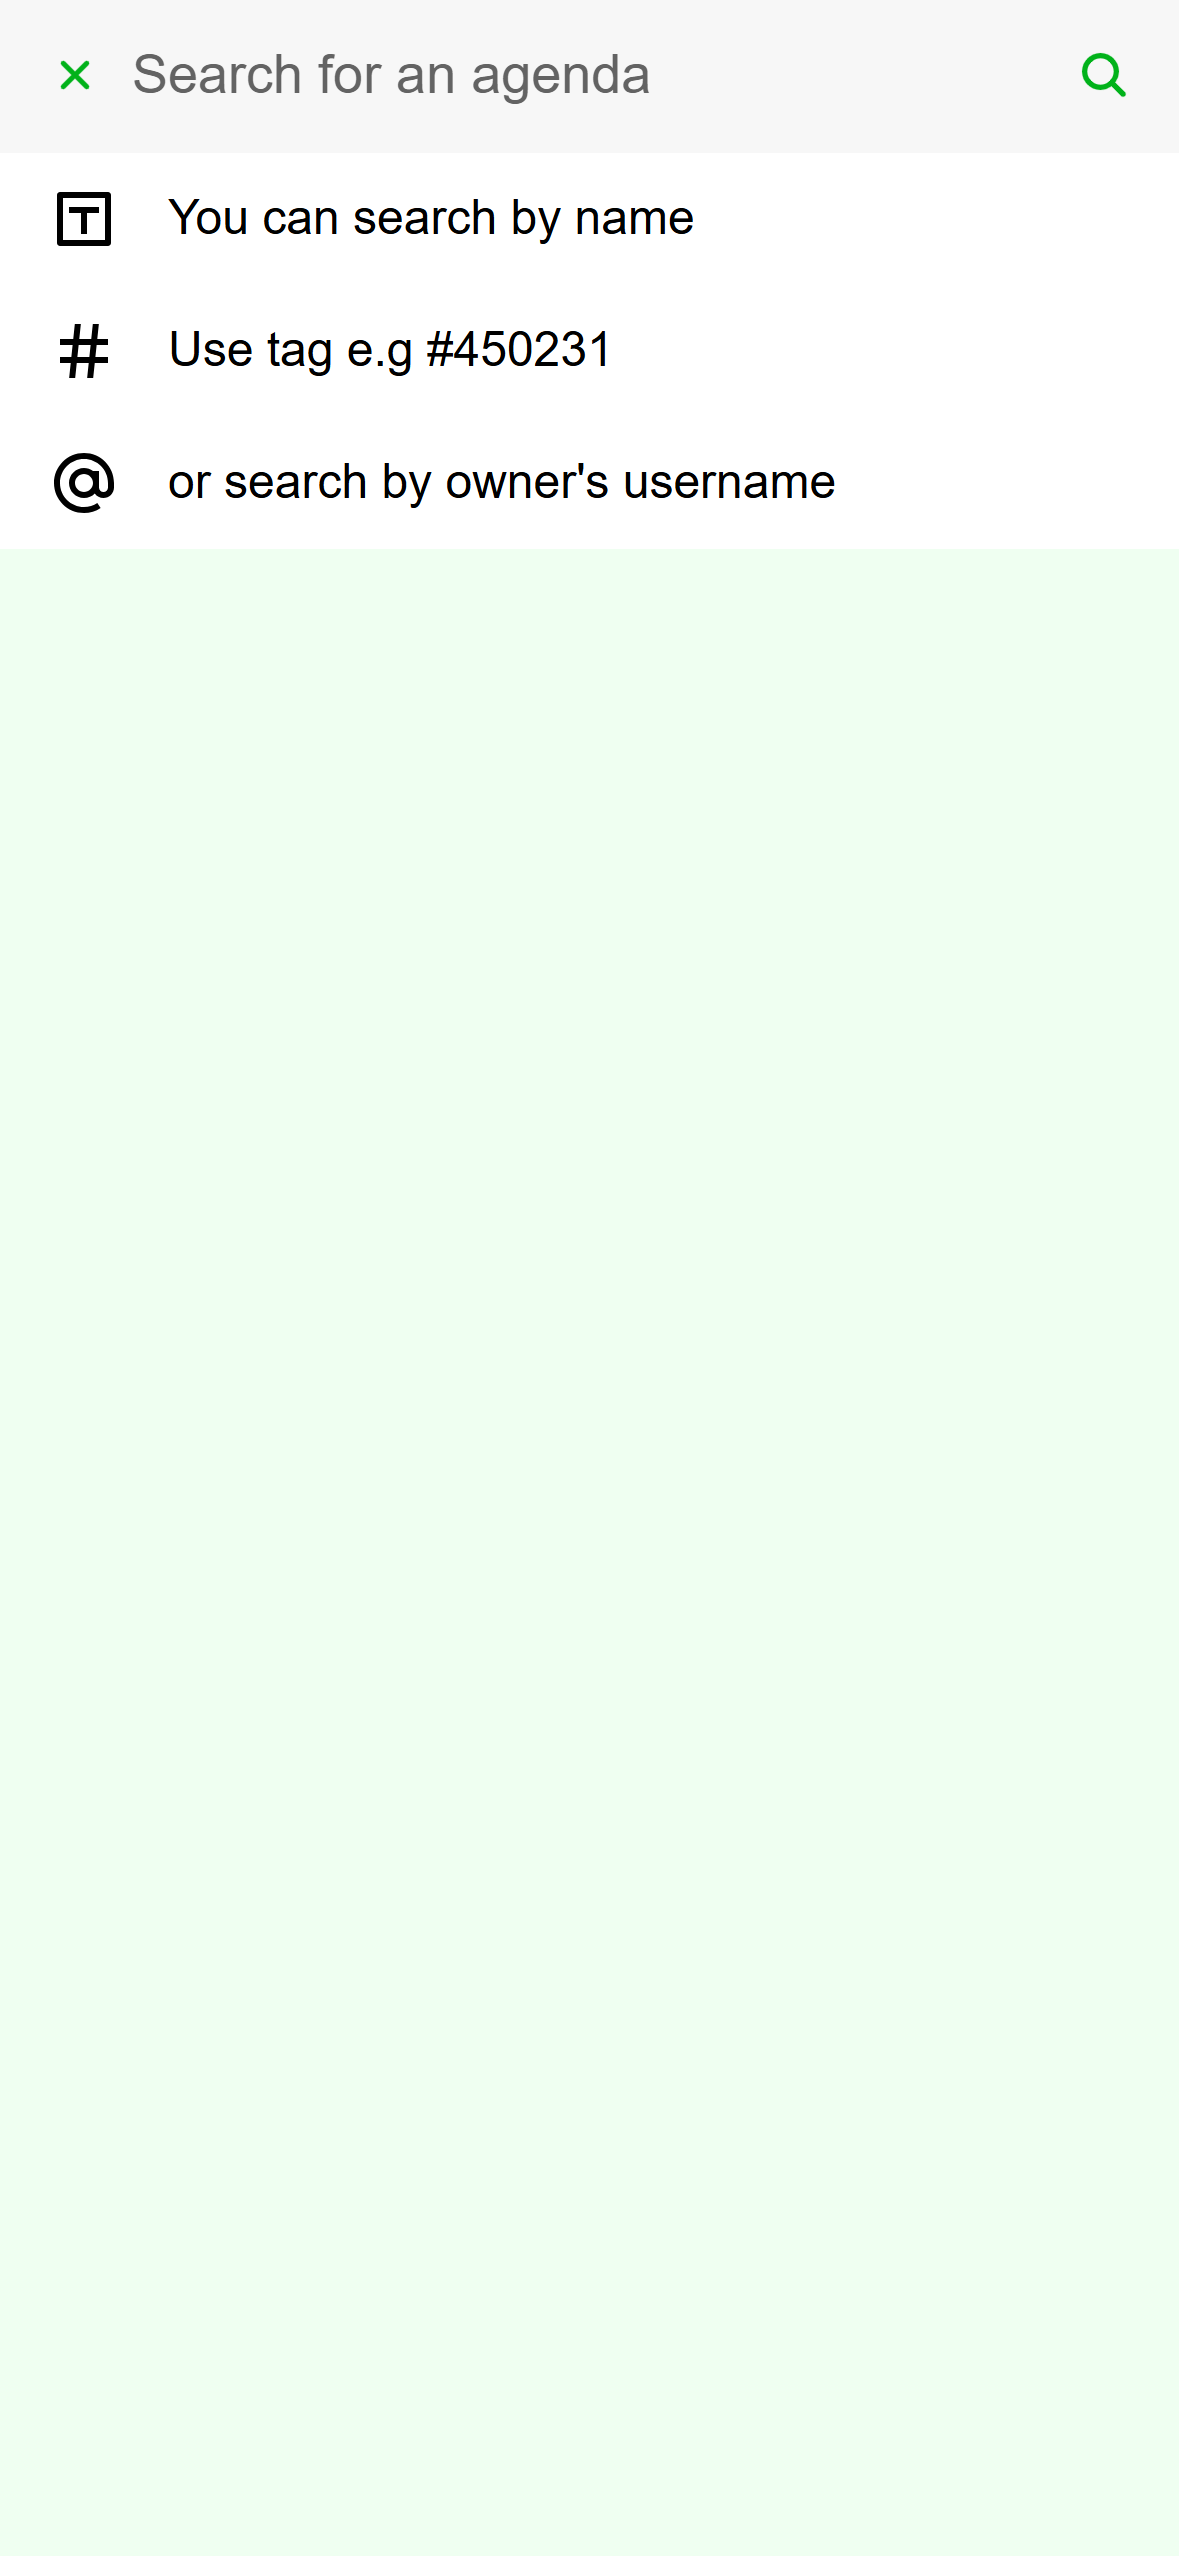
- Type here, then tap the magnifier.
- The three ways to search.
Mobile: Search by name, tag, or owner. Check the Agendas list on the form. Tap the X beside an agenda to take it back out. Then tap Finish. The app reloads and opens your new timetable.
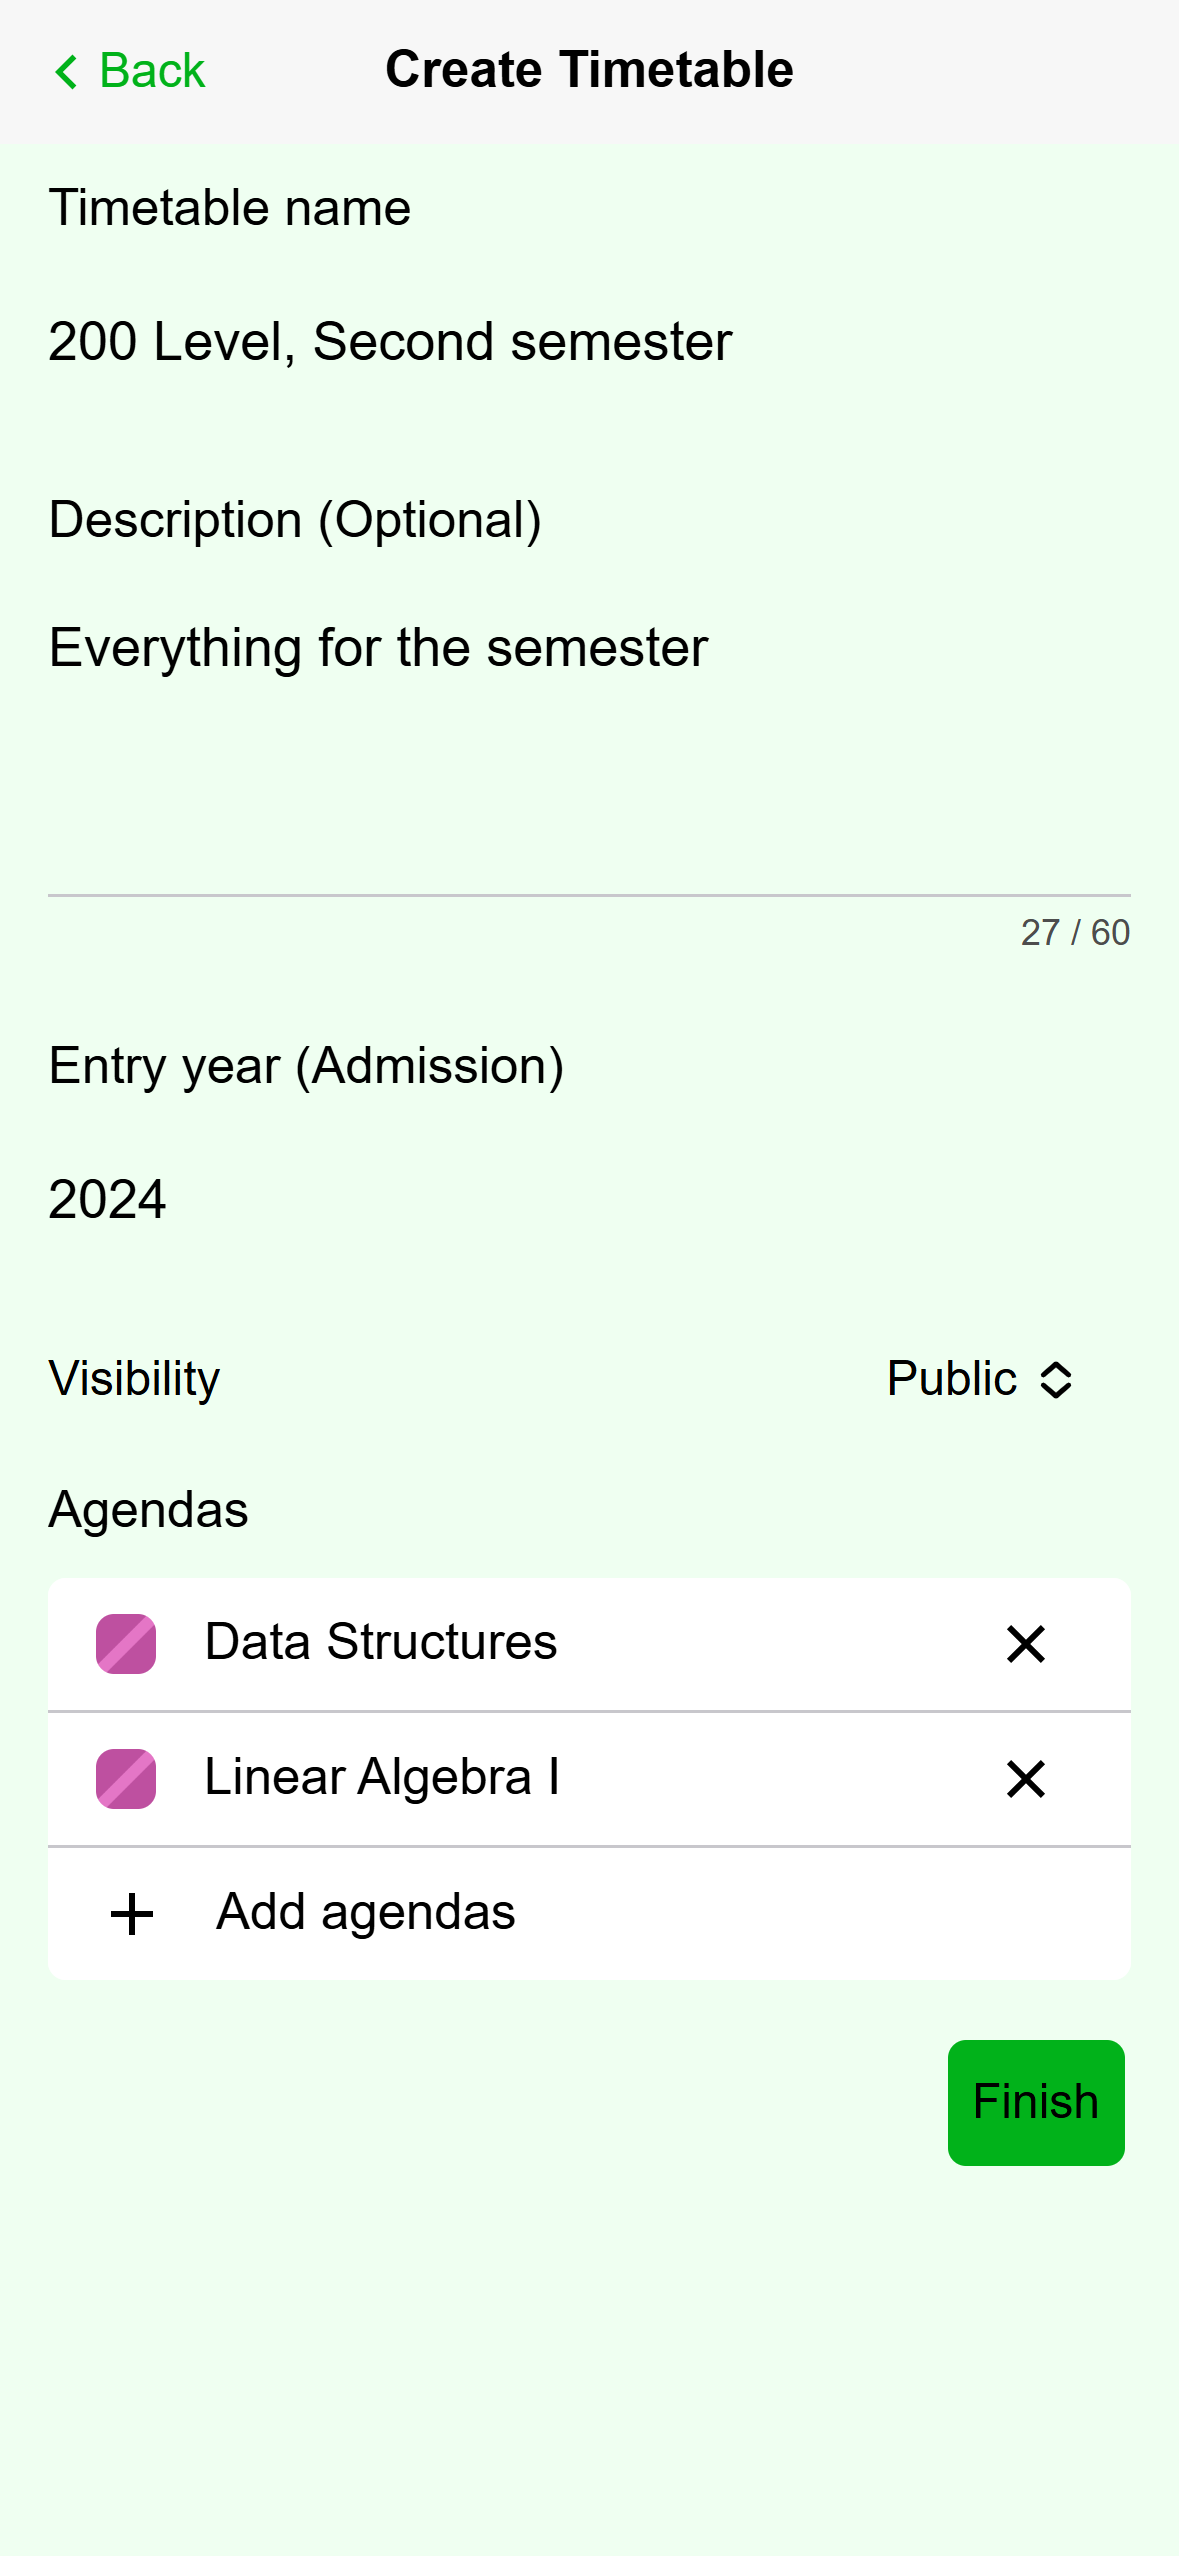
- The agendas you added. The X takes one back out.
- Add more at any point.
Mobile: Two agendas added, ready for Finish.
When you tap Finish, the phone also tries to join any agenda you picked from search, so its classes appear on your Schedule. If a message appears at the bottom, it is the reason Acadeva gave, or An error occurred. Try again later. The first time, the phone may ask Get reminders for these classes?. Tap Not now to skip it.
Click Schedule in the left rail, then Manage schedule. Scroll down to Owned timetables and click New.
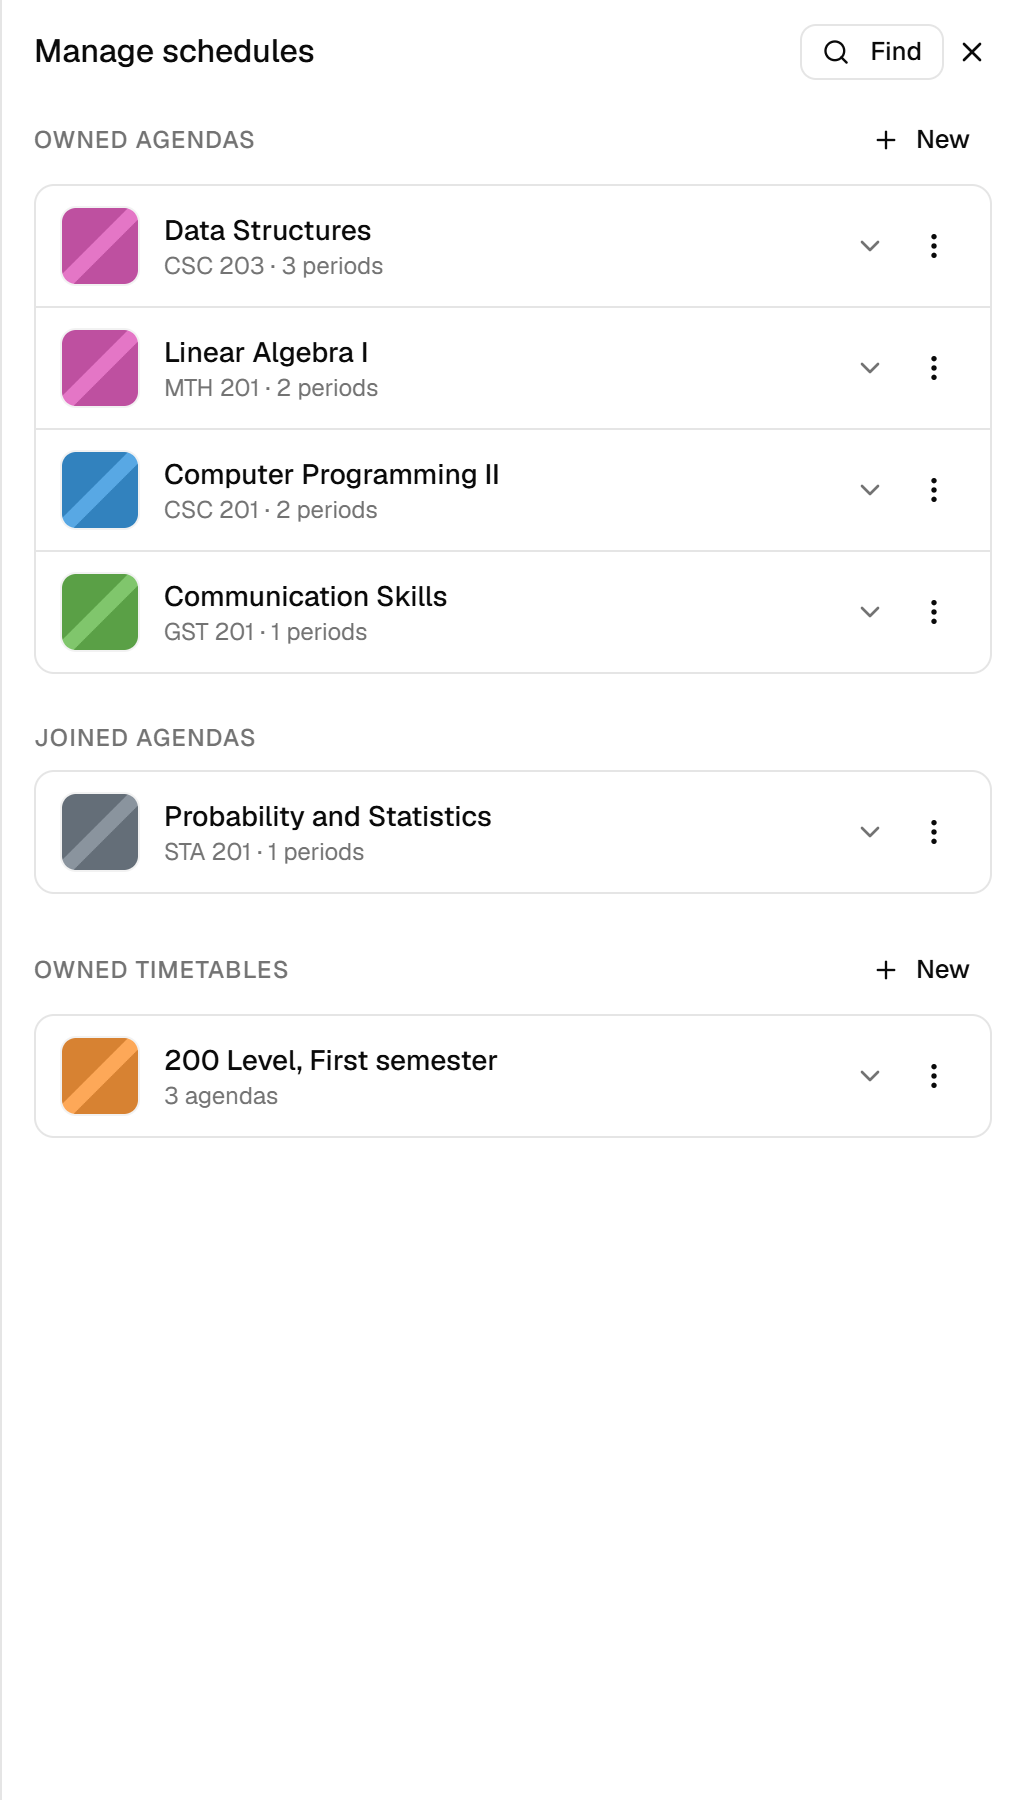
- New timetable.
- Your timetables. Click one to open it.
Desktop: Owned timetables in Manage schedule. Type a Name. It is the only required field, and Create stays off until you type one. Add a Description if you like. Visibility starts on Private. Choose Public to let other people find it.
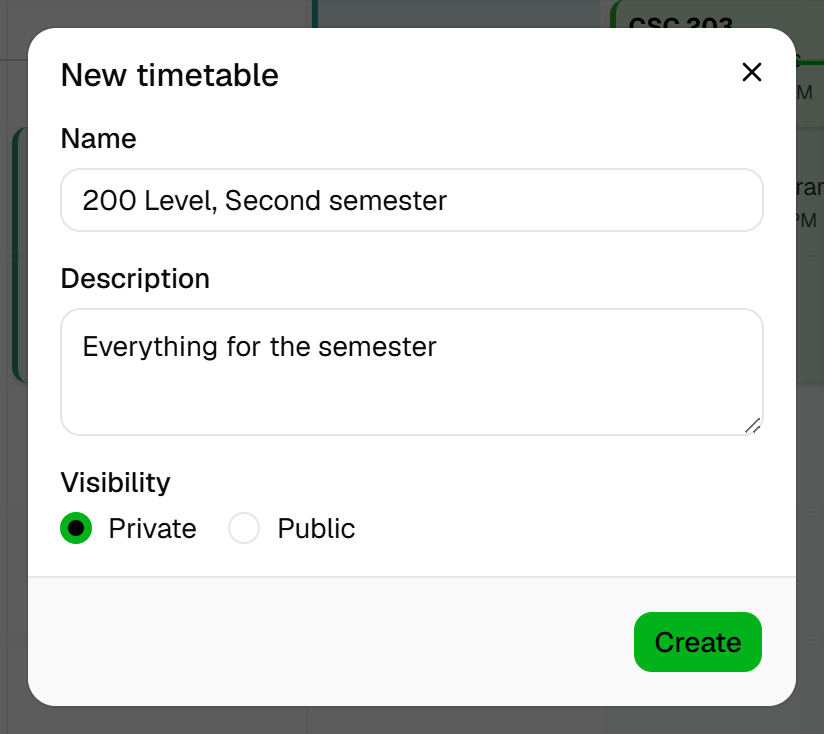
- The name is required.
- Private is the default.
- Click Create.
Desktop: The New timetable dialog. Click Create. You see Timetable created, and the timetable appears under Owned timetables with no agendas in it.
The desktop form has no entry year and no agenda picker. You add agendas from the timetable's own row, as described next.
Step 2: Add or remove agendas later
Open Manage and tap the timetable. You see its agendas, with Edit near the top. Edit only appears if you own the timetable or collaborate on it.
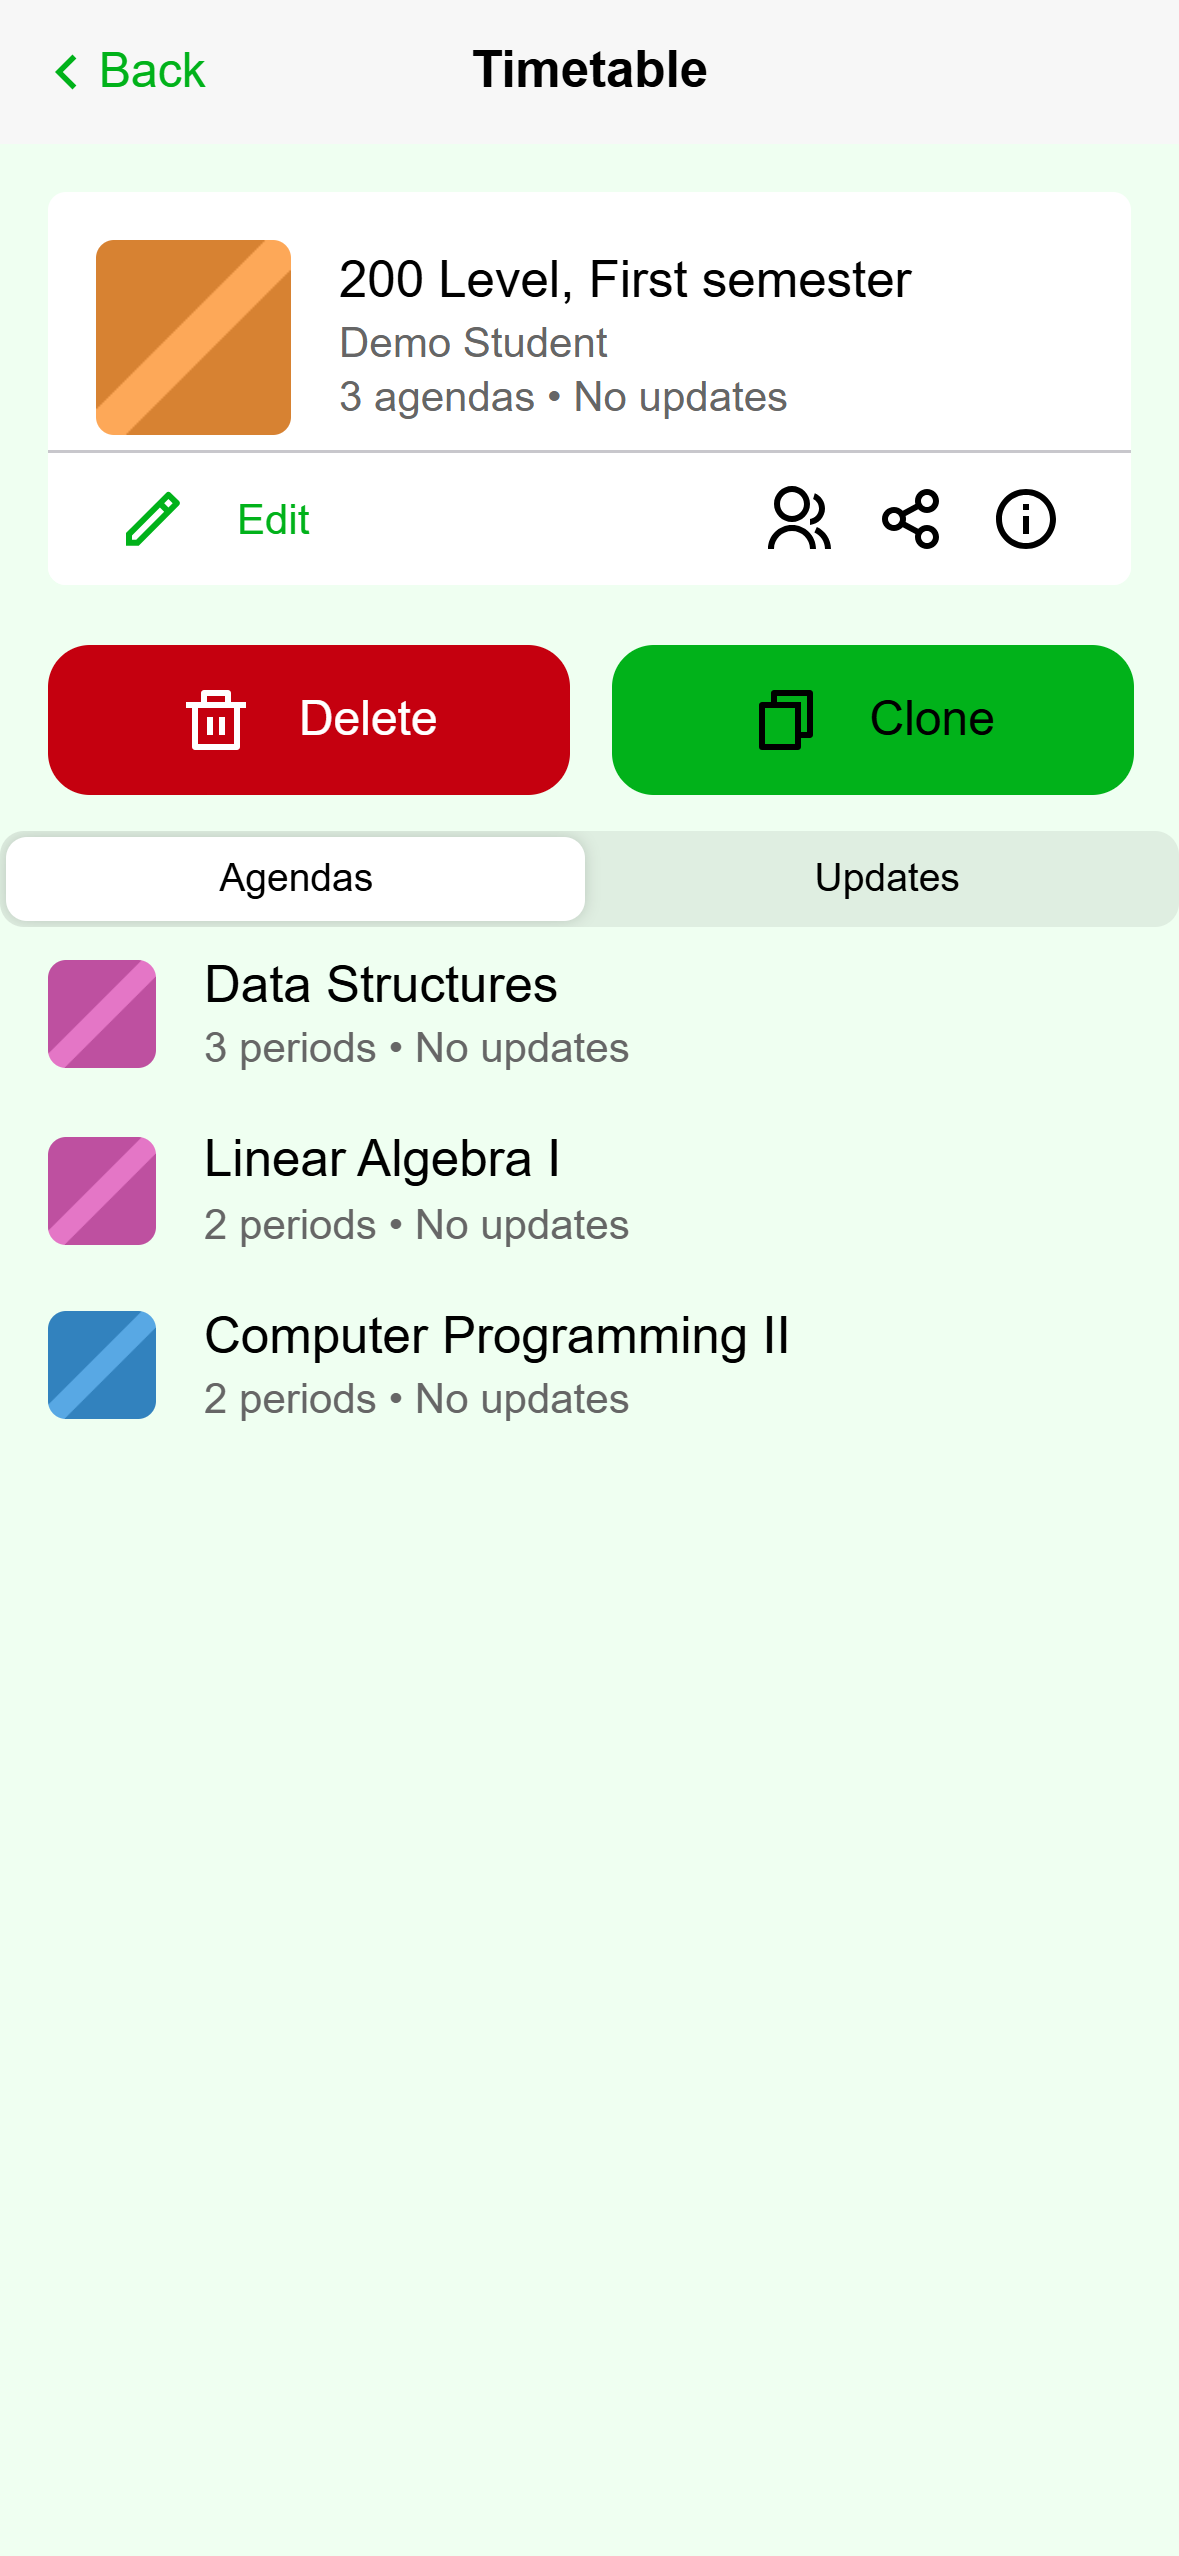
- Edit.
- Delete removes the timetable, not its agendas.
- Clone makes your own copy.
- The agendas in the timetable.
Mobile: A timetable you own. Tap Edit. The screen is still titled Create Timetable, but it is filled in with your timetable. Tap Add agendas to add more, or the X beside an agenda to take it out. You can also change the name, description, entry year, and visibility here.
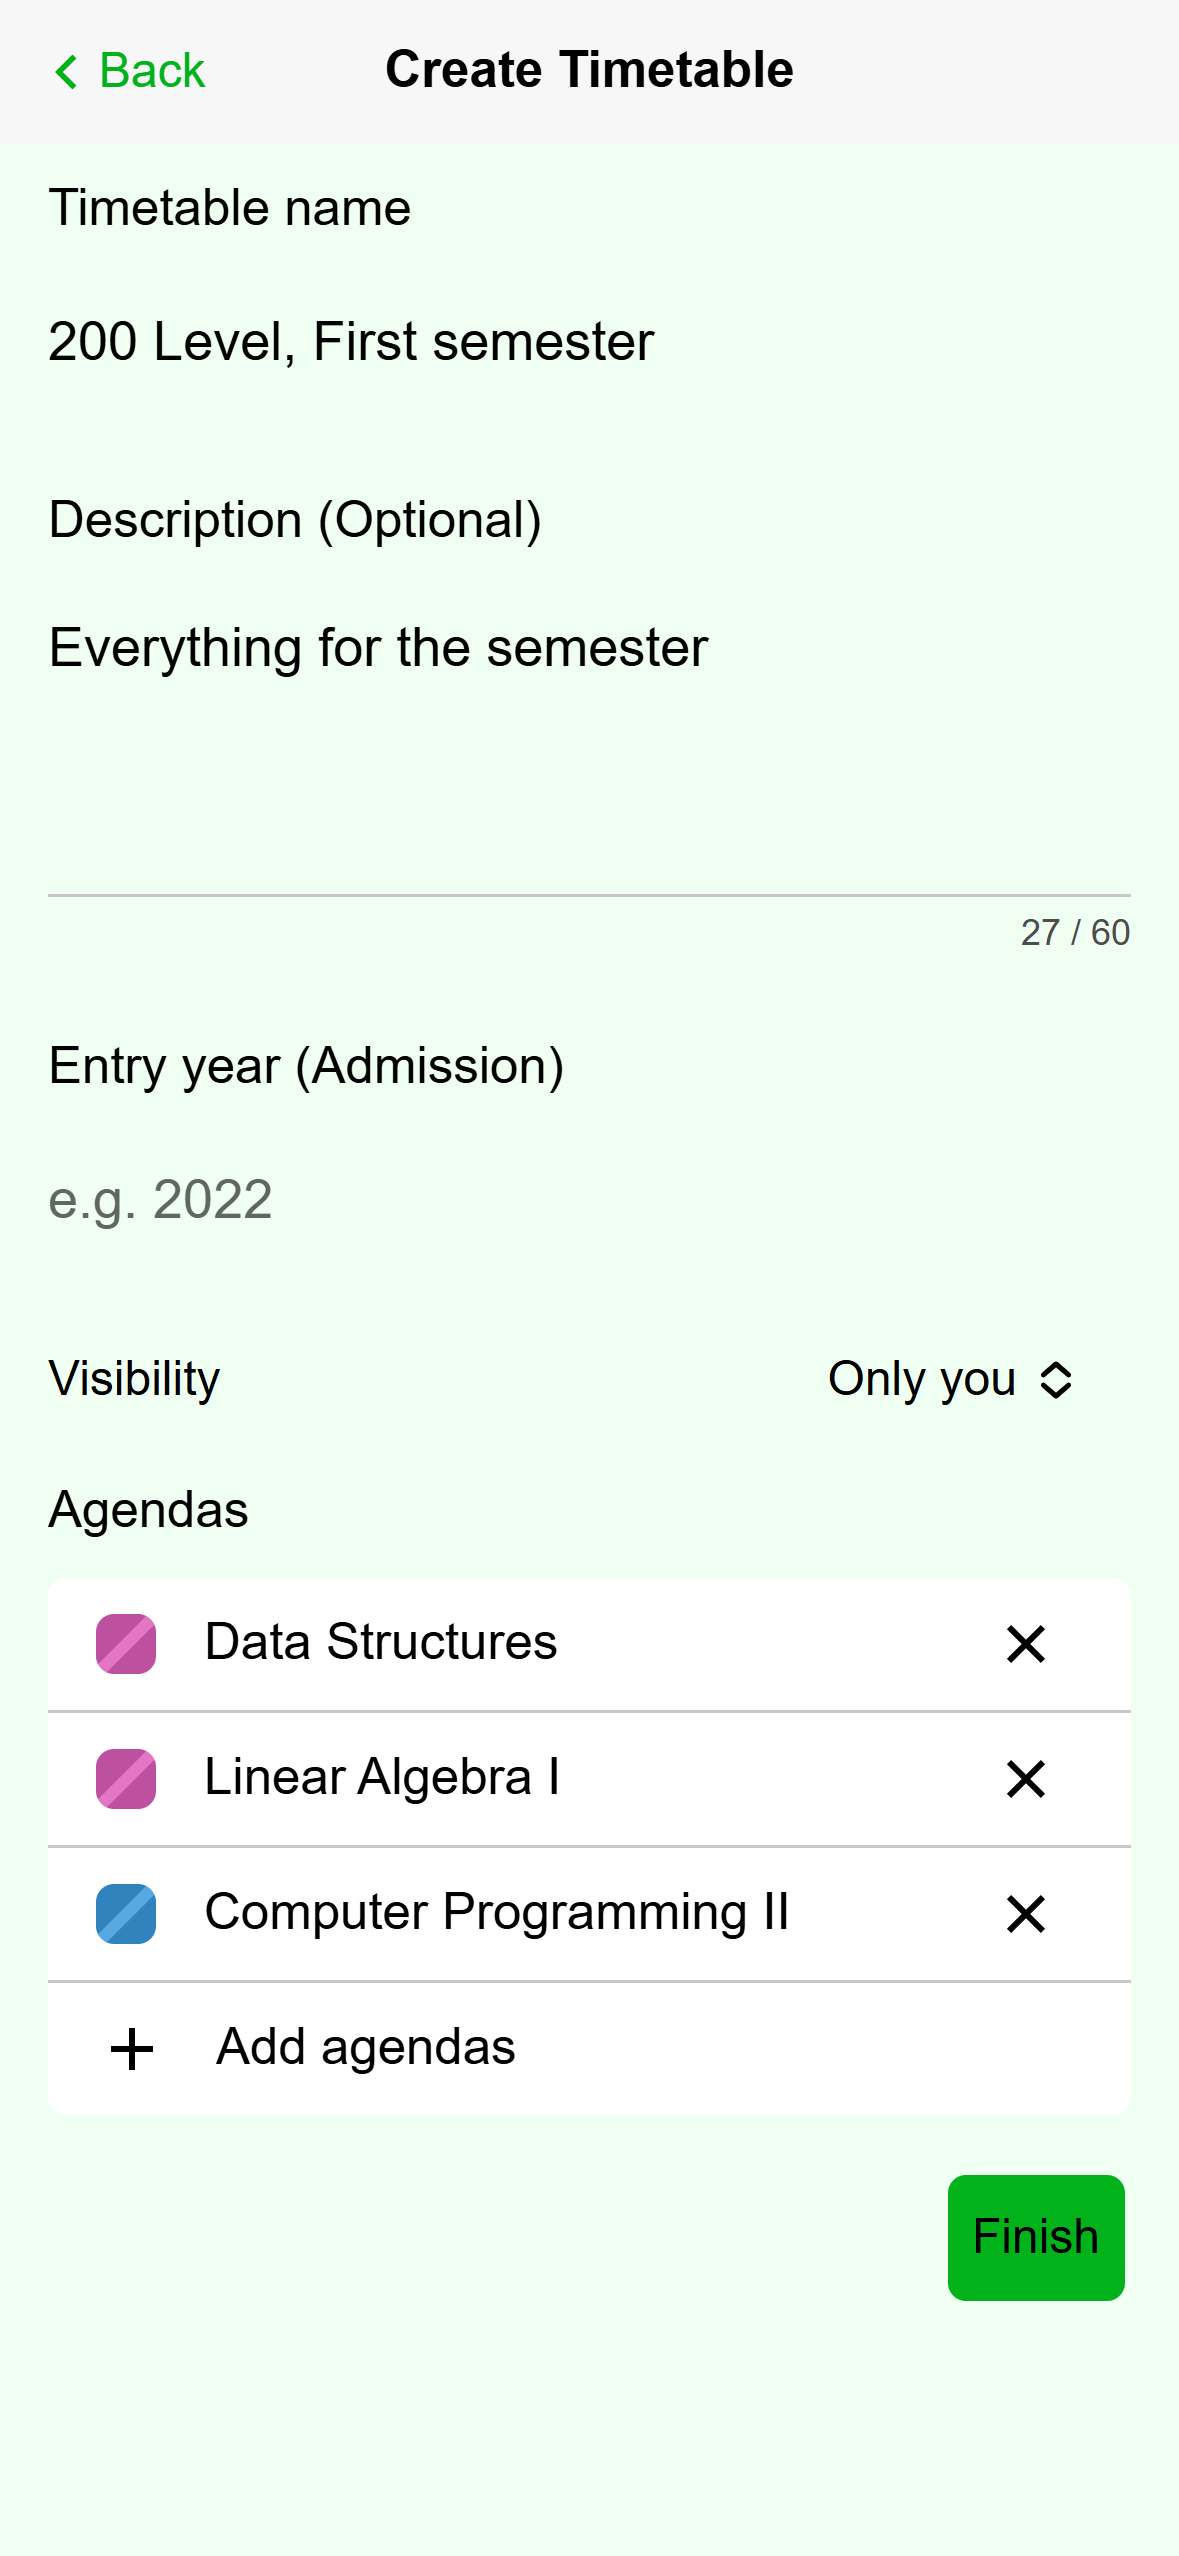
- Each agenda has an X. Add agendas is at the bottom of the list.
Mobile: Editing a timetable. Tap Finish. The change is saved on your phone and sent when you are online.
In Manage schedule, click the timetable's row under Owned timetables to open it. Its agendas are listed under Agendas.
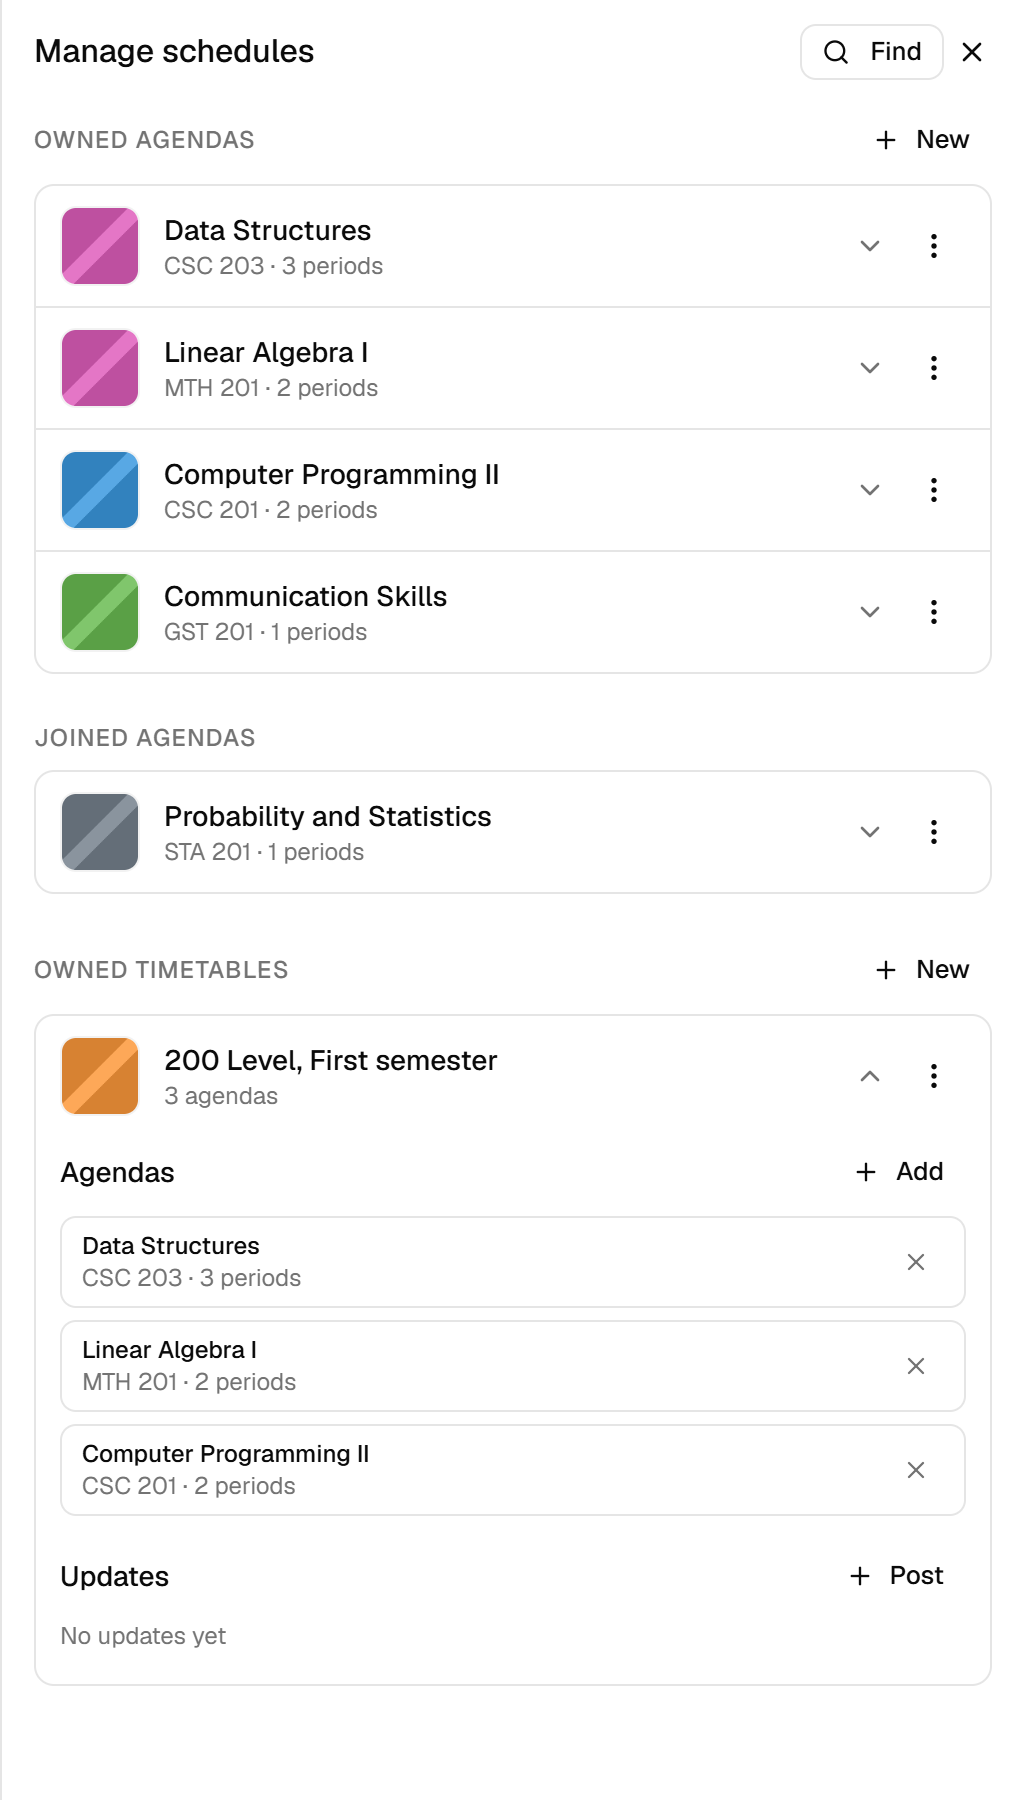
- Add an agenda.
- The X takes an agenda out of the timetable.
Desktop: A timetable opened in Manage schedule. Click Add, then click an agenda in the list. You can type in Search your agendas to narrow it. The list has the agendas you own or joined that are not in the timetable yet, and Add is greyed out when there are none left.
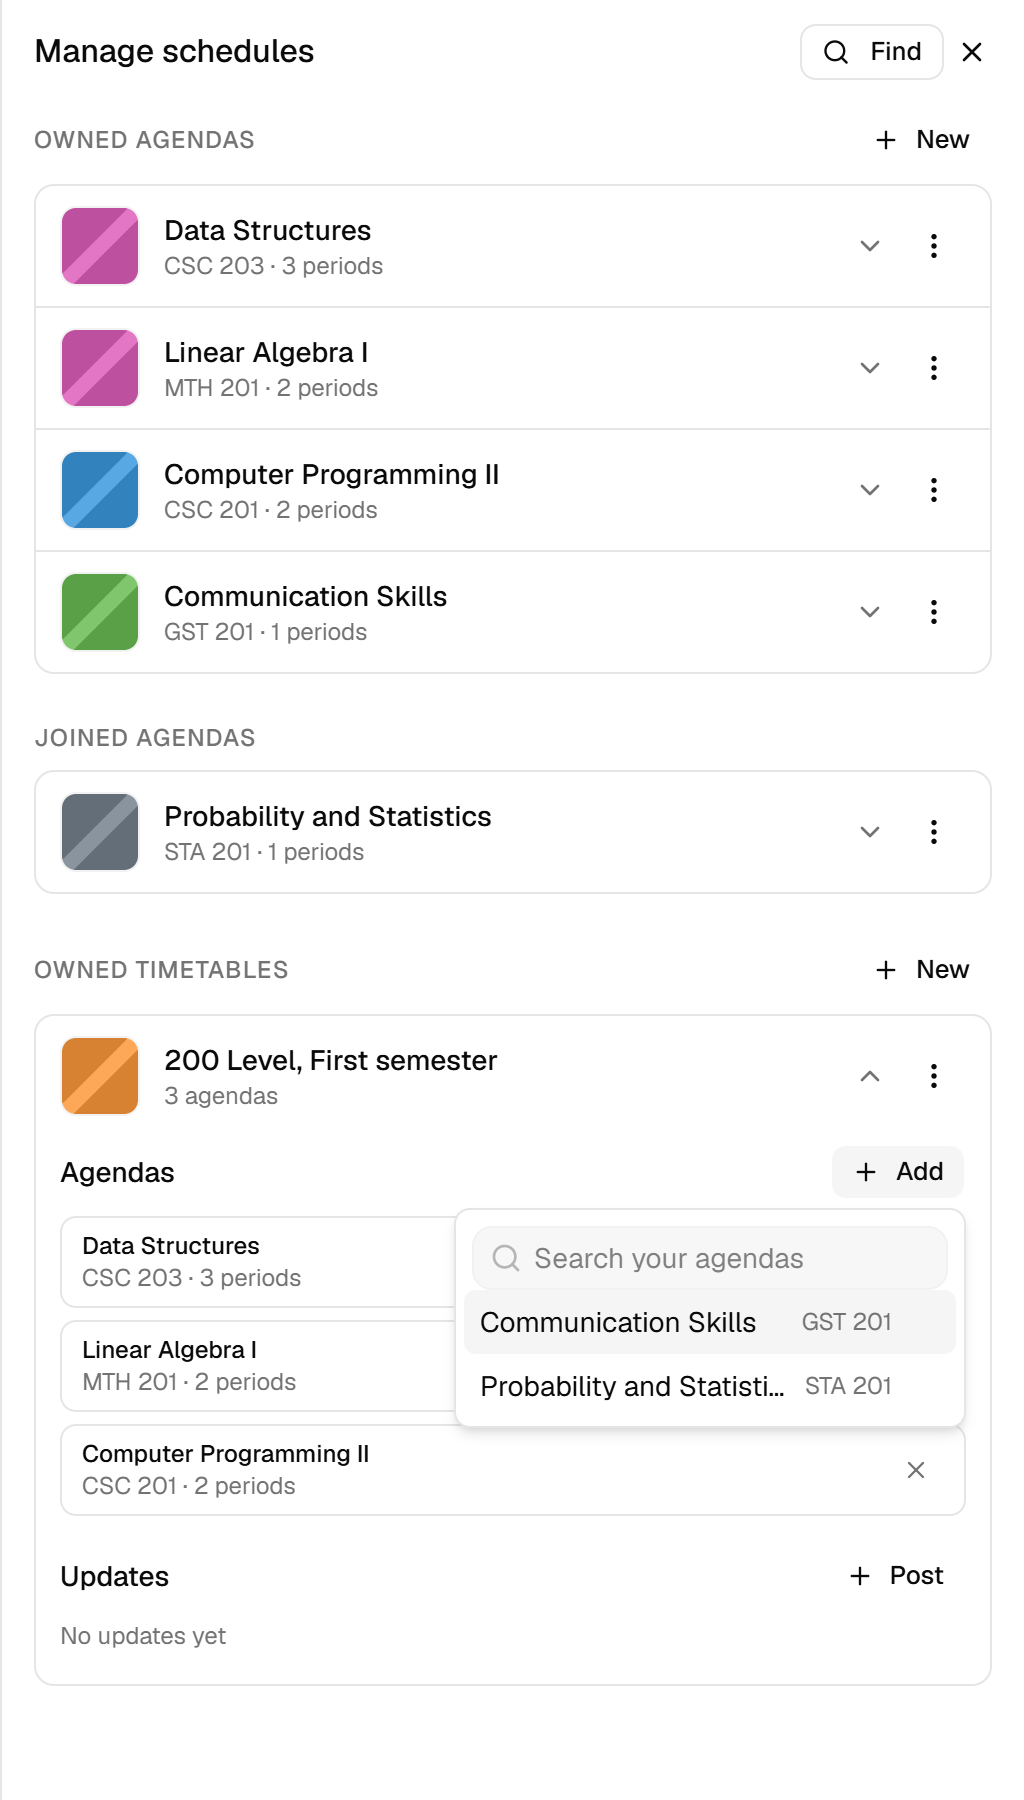
- Only agendas that are not in this timetable yet.
Desktop: Pick an agenda to add. To take one out, click the X on its row. You see Removed from timetable with an Undo button for a few seconds.
The agenda you want is not in the list? You have not joined it yet. Click Find (or press Ctrl+K), join it, then add it.
Taking an agenda out of a timetable never deletes the agenda, and its classes stay on your Schedule. Acadeva's servers only record agendas being added to a timetable, so a removal may not reach your other devices or the people who joined it. If a timetable needs to lose an agenda for everyone, build a new timetable with the agendas you want.
Change or delete a timetable
Use Edit to rename it or change its description, entry year, or visibility. To remove it, open the timetable and tap Delete, then Delete again in the Delete timetable? box. The agendas inside it stay.
The desktop app cannot rename a timetable or change its visibility after you create it. Use the phone app for that. To remove one, click the three dots on its row and choose Delete. You see Timetable deleted with an Undo button, and the agendas inside it stay.
Before you share it
- On the phone, joining a timetable joins every agenda in it, so all its classes land on that person's Schedule.
- On desktop, joining a timetable only adds the timetable. Its agendas show as not joined until the person joins each one with Find.
- An agenda set to Only you is left out for people who are not already part of it. Make the agendas Public if you want a timetable to bring them along.
If it doesn't work
- Finish or Create is greyed out. The name is empty. Type one.
- The timetable would not save. Creating one needs a connection. Check you are online and try again.
- There is no Edit or Add button. You joined this timetable instead of making it. Use Clone on the phone or Duplicate on desktop to get a copy you own.
- A class is missing from my Schedule. The timetable does not decide what the Schedule shows. Check that the agenda is one you own or joined, and that you are looking at the right week.